CD process - integration with Jenkins
So far in this blog series, we have seen the CI process from a Developer and DevOps (Build/Jenkins) perspective. We have also understood the benefit of using Docker containers for consistency between developers and DevOps system.
In this blog, we will create another docker based Jenkins agent - this time for deployment of an artifact - which in my case is the static HTML version of my blog. The actual deployment step is to copy the files of my static site to an AWS S3 bucket. We could have used a plugin for AWS S3 and directly used the plugin in the Jenkins job to perform a deployment to AWS. But building a customized agent for CD (continuous deployment) gives us the ability to install more tools that might be needed in real world environments. You can install tools like Terraform and Ansible etc and use them to perform more complex tasks.
Here is a picture of CI and CD pipeline together. The goal of this blog is to take the artifact generated by the CI pipeline and use the CD pipeline to deploy the artifact to AWS S3.

The CD Docker file and image
The first step to create a CD pipeline is creating a Docker file that works with Jenkins and also supports AWS CLI commands. Here is my Dockerfile the covers both purposes:
FROM jenkins/inbound-agent:latest

MAINTAINER Sriram Subramanian <sriram@cloudbuilder.in>

USER root
RUN  apt-get update && apt-get upgrade -y && apt-get install -y curl groff less unzip
RUN curl "https://awscli.amazonaws.com/awscli-exe-linux-x86_64.zip" -o "awscliv2.zip"
RUN unzip awscliv2.zip
RUN ./aws/install
Note: I am specifically installing AWS CLI version 2 in my docker container.
Using the CD Docker image
The above docker container is built with Jenkins inbound-agent as the base. But as mentioned in the earlier blog, we can use the entrypoint parameter of the docker run command, to override the default behavior of the Jenkins inbound-agent image. Here is an example of using the above docker image as a container to execute AWS CLI Commands:
docker run --rm -it --name dev-hugo-cd \
    -v ~/.aws:/root/.aws --workdir '/aws' --entrypoint "" \
    cloudbuilder/hugo-cd:0.1 /usr/local/bin/aws s3 ls
As you can see, we started the container with an empty entrypoint parameter. This ensures that Jenkins agent does not get started. In the next section, we will pass an appropriate parameter to the docker run command to make sure that Jenkins inbound-agent starts up as part of the container start up.
Setting up the CD Container as a Jenkins agent
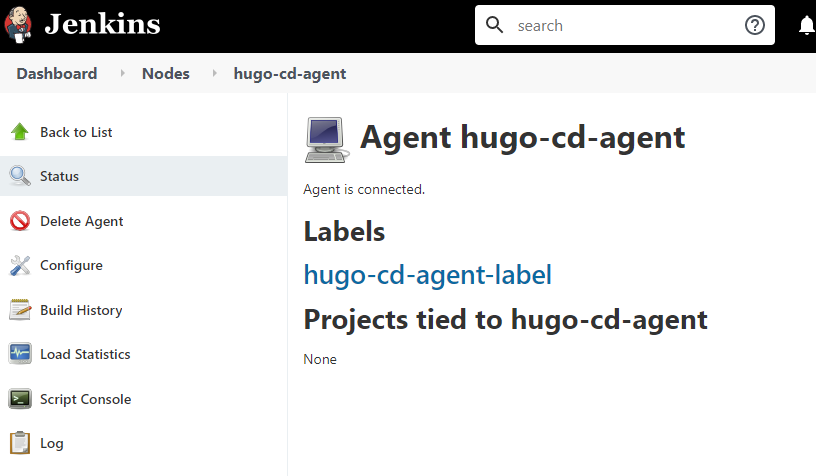
In the previous blog, I showed how to setup a Jenkins agent node and how to associate a docker container to it. You can follow the same steps to create a Jenkins permanent node. Here is the configuration of my CD agent on Jenkins. The Labels attribute is important and it will be used when we create the CD job (project).

In order to associate the CD docker container to the Jenkins agent node, adjust the docker run command for the entrypoint parameter along with other Jenkins parameters. Here is the docker run command:
docker run --rm -it --name hugo-cd-container \
    -v ~/.aws:/home/jenkins/.aws --user jenkins --entrypoint "jenkins-agent" \
    --network host cloudbuilder/hugo-cd:0.1 -url http://192.168.1.64:8080/ \
    e732955d1d5b2e186c50d00177e7d6371dff944f5758829d11e8cfed871bfb50 hugo-cd-agent
In the command above, hugo-cd-agent (the last parameter) is the name with which I had created the Jenkins agent node. At this stage, the CD docker container should be acting as a Jenkins node and its status in Jenkins should be connected.
We will now see how to setup the job that will be executed on this CD agent.
Setting up Jenkins job for Deployment
The most important input for a deployment pipeline is the location of the artifact. If you recollect, the CI process ends with the creation of one or more artifacts. These artifacts are validated in test environments and the best version of the artifact is selected for deployment. In real world projects, artifacts are stored in popular tools like JFrog Artifactory or Sonatype Nexus.
As mentioned earlier in this blog, the goal is to copy the artifact generated by the CI pipeline and then deploy it to AWS. First we will install a Jenkins plugin called Copy Artifact Plugin. This plugin is used copy artifacts from Jenkins job into another.
Since the deployment needs to select a specific build, we need to add that a build selector parameter to the Jenkins job configuration. In the image below, the job named hugo_deploy uses a special parameter called BUILD_SELECTOR (you can use any name) which is then used by the Copy Artifact plugin. The second parameter is the AWS S3 Bucket name where the artifact (in my case, the static website content) needs to be copied.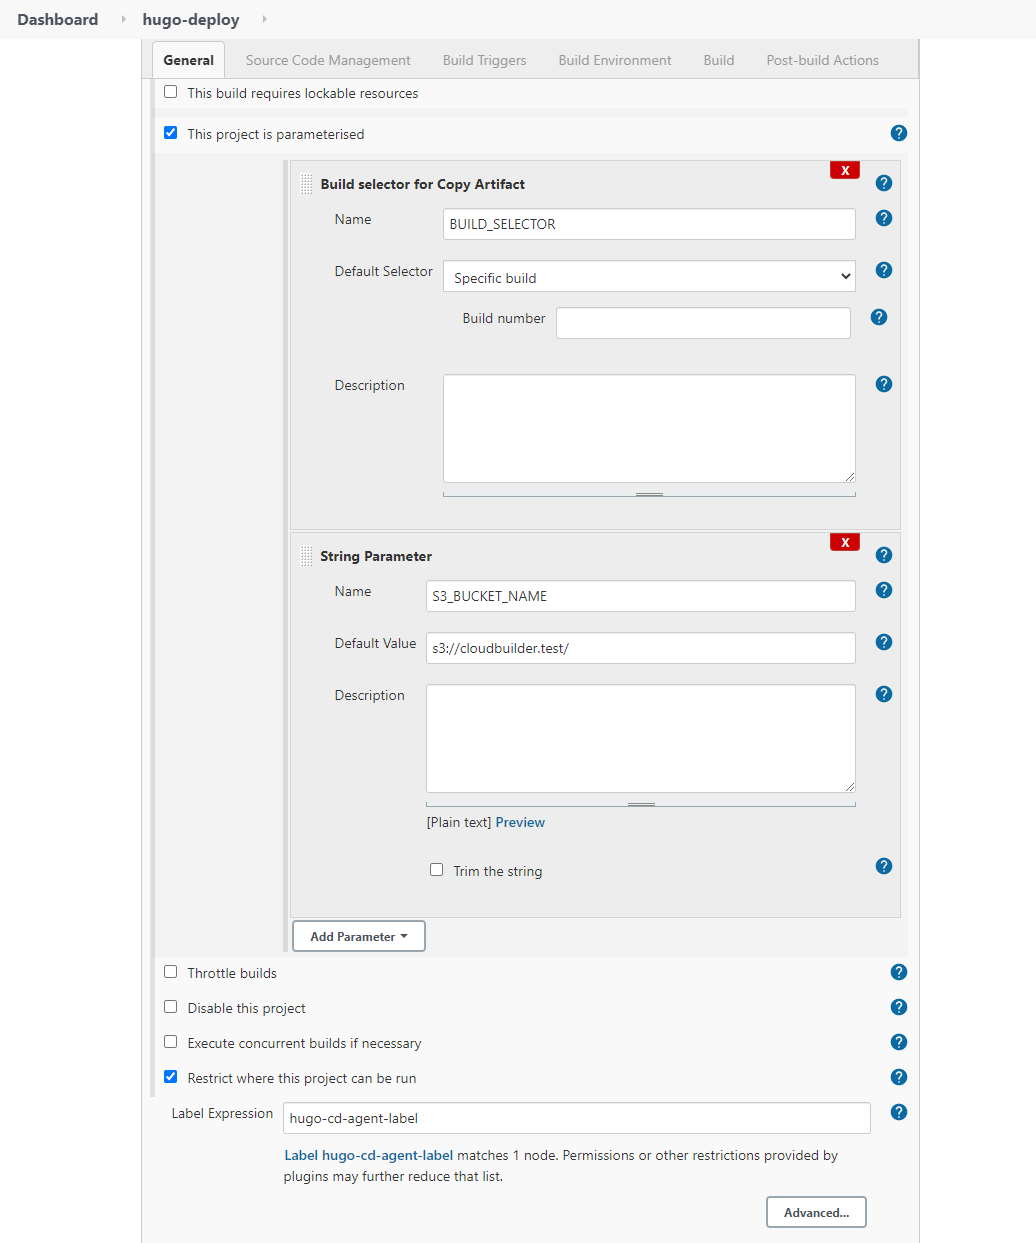
The first step in the hugo-deploy pipeline is to copy the artifacts. For this we specify the source project from which the artifacts will be copied. As shown in the image below, we specify the source CI job (hugo-blog-builder) for this. We also associate the parameter BUILD_SELECTOR so that the selected build number is passed as a parameter to the Copy Artifact plugin. Finally we specify the artifacts to copy.
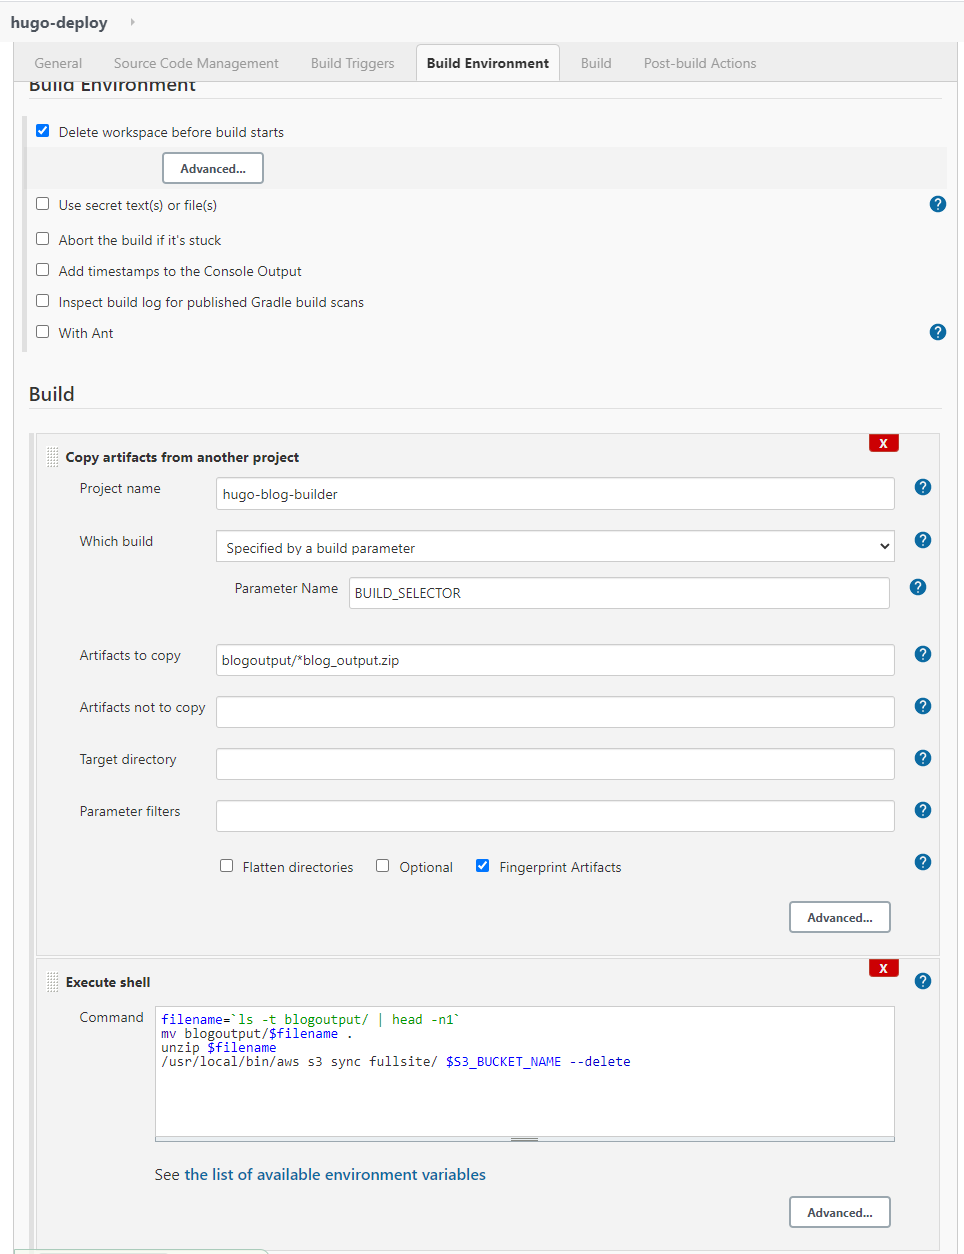
When the CD pipeline job executes, it will perform the “copy artifact” step and copy the artifact into the CD container. In our example, it will be a ZIP file that is copied into the Jenkins workspace folder inside the CD container. Once the copy is completed, the second step, which happens to be a set of shell commands, is executed. As you can see from the image above, the shell commands basically unzips the artifact containing my static website and the files are then synced to AWS S3 bucket.
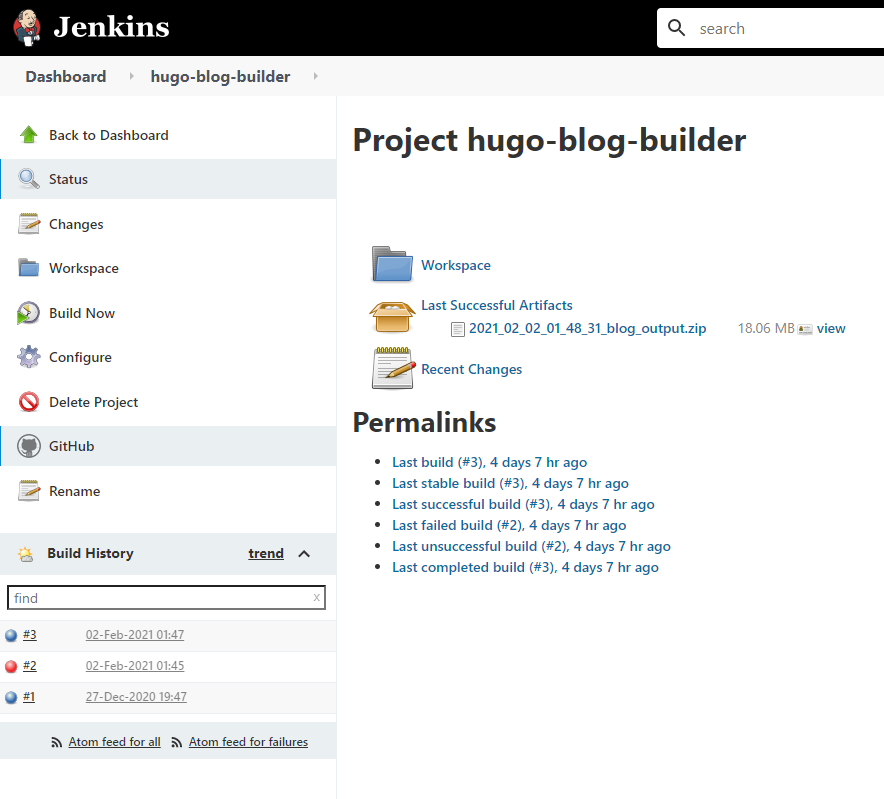
Before I show you how to run the job, let us see how my CI pipeline looks like. As seen in the screenshot below, the CI pipeline hugo_blog_builder has three jobs. My goal is to select the artifacts from job #3 and use it for deployment.
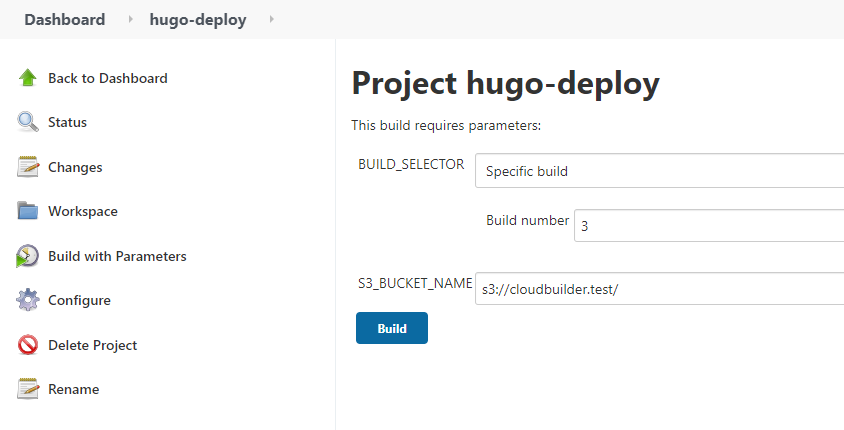
When you run this pipeline, you will see a screen as the one below. And in this screen, I have to enter 3 which is the source job from which the artifacts will be copied. Once you click Build the deployment job will execute and you can see the success or failure.
This concludes the steps to setup and execute a deployment pipeline using Jenkins and a docker based agent.
Next up
I have shown you how to create a Docker based agent for Jenkins to run your deployment pipeline. In real world, the deployment steps are generally much more complex but if you use Jenkins, the broad process is likely to remain the same. Instead of the simple shell commands that I showed, you might be using tools like Ansible, Terraform etc to handle the complex deployment needs.
In the final installment of my CICD Blog series, my intent is to cover a bonus topic. I am still in the process of finalizing it, so stay tuned.