CI process - the DevOps and Jenkins perspective
So far in this blog series, we have seen the CI process from a developer perspective. We have also understood the benefit of using Docker containers for a consistent experience between developers and DevOps systems.
In this blog, I will show you how to use Jenkins as the CI system and build packages automatically. More importantly I will show you how to use the same Docker container image, as used by developers, as a Jenkins agent. This shared use of the infrastructure is important for an effective and efficient CI Process.
It is useful to remember that CI systems and processes usually kick in when developers are ready to merge their code or have already merged their code. So CI systems typically work off the master branch of the source code repository. And the CI process ends with the generation of an artifact. This artifact(s) will be the input for the CD process.
About Jenkins
Jenkins is the most popular, open-source CICD and automation software. It has a very rich ecosystem of plugins that make it the first choice for most CICD process implementations. In real world projects, Jenkins is deployed as a distributed build system. In short, the distributed Jenkins system has a master node and the agent node. The master Jenkins node is the brain of this system, whereas the actual builds and automated steps are carried out on the agent node.
For this blog, I will be using Docker containers to run the Jenkins master and the agent nodes. Here is the picture of the setup.
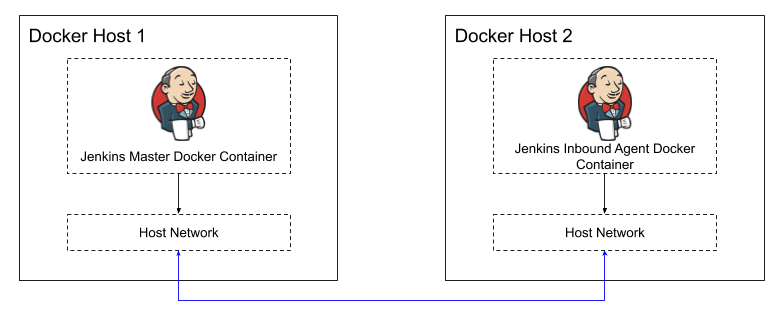
There are many tutorials for setting up the Jenkins master container. However, we have a custom Docker image to be used as an agent. Therefore, I will show you how to setup the Jenkins agent using the Docker image we created in the previous blog. We will also see how to configure a build job and execute it on the agent.
Preparing Jenkins (master) for an inbound agent
The first step in setting up the agent is to prepare and configure a node on the Jenkins master. Here are the steps to do the same.
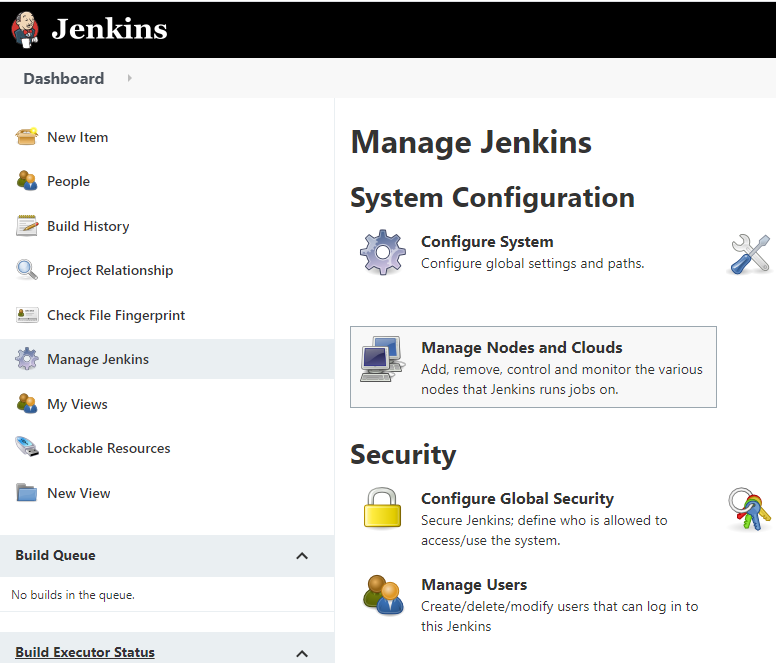
- Login to the Jenkins master and select the “Manage Jenkins” on the left navigation menu and then click on “Manage Nodes and Clouds”.
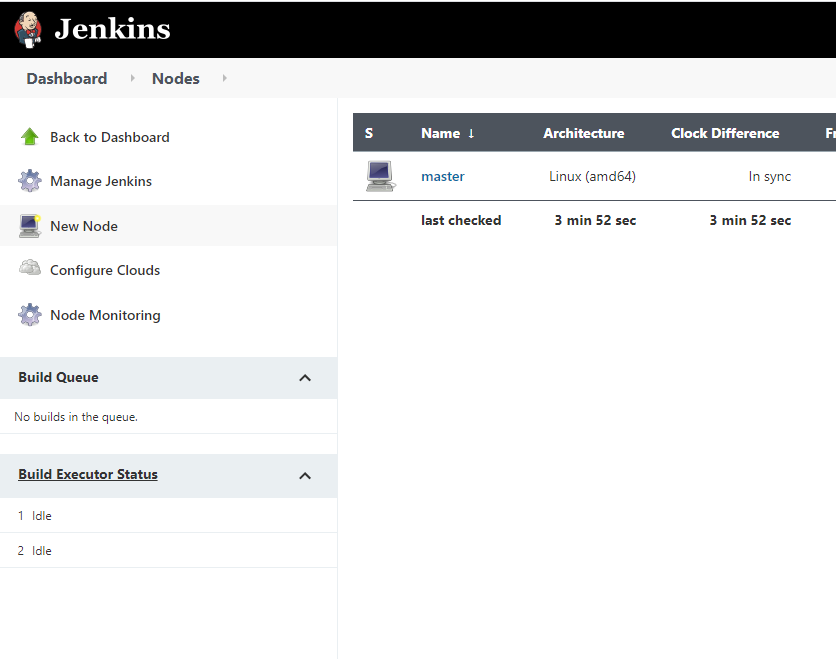
- Next, click on “New Node”.
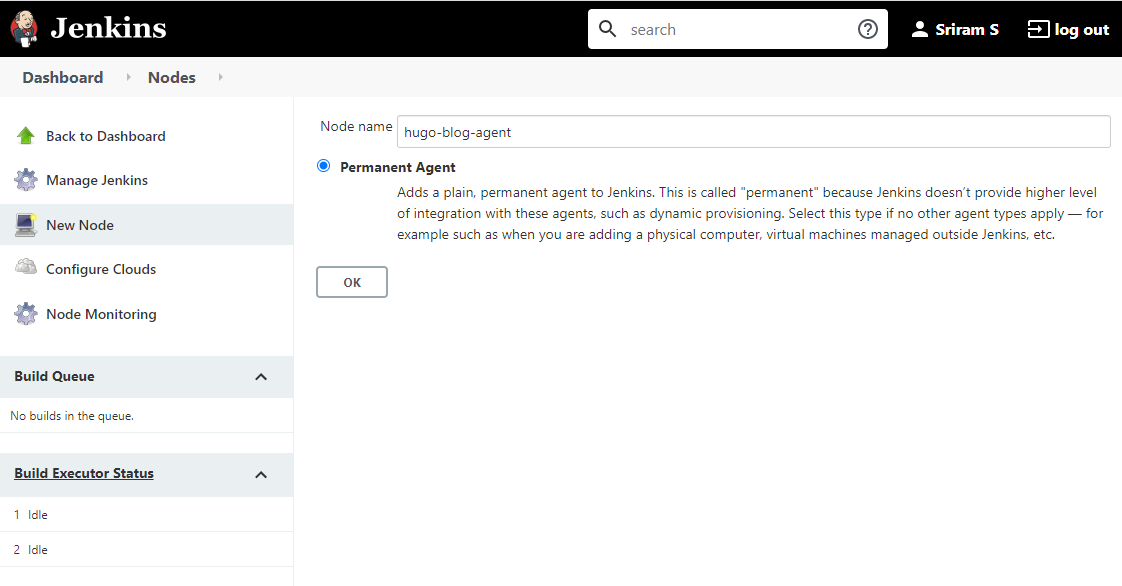
- Enter the desired name for the agent node and select the “Permanent Agent” option. Then click the OK button.
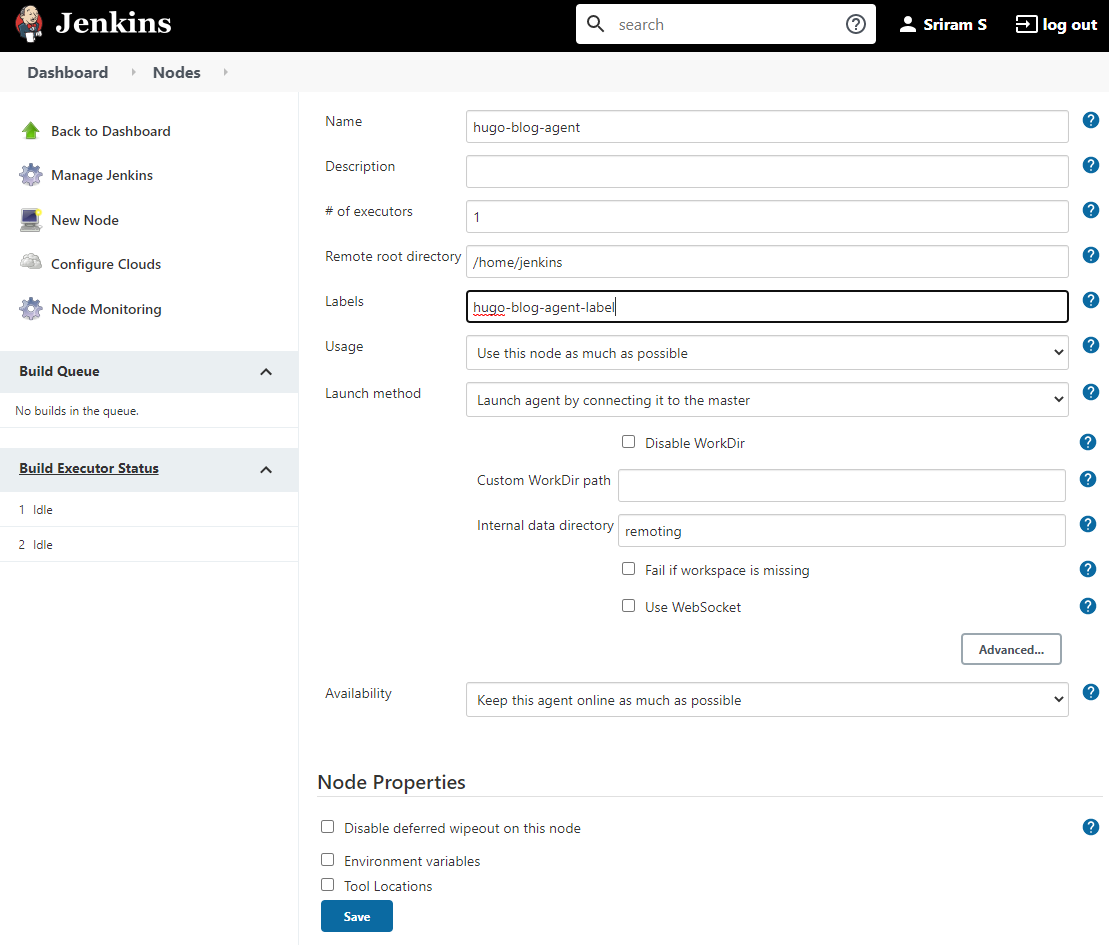
In the next screen, enter the “Remote Directory” - this directory will reside on the agent and will be used by the Jenkins Master. Note: the “Launch method” should be “Launch agent by connecting it to the master”. This implies that we will be using the Inbound agent. If you recollect my previous blog, we used the Jenkins Inbound agent as the base image for the docker container. Click Save at the end.
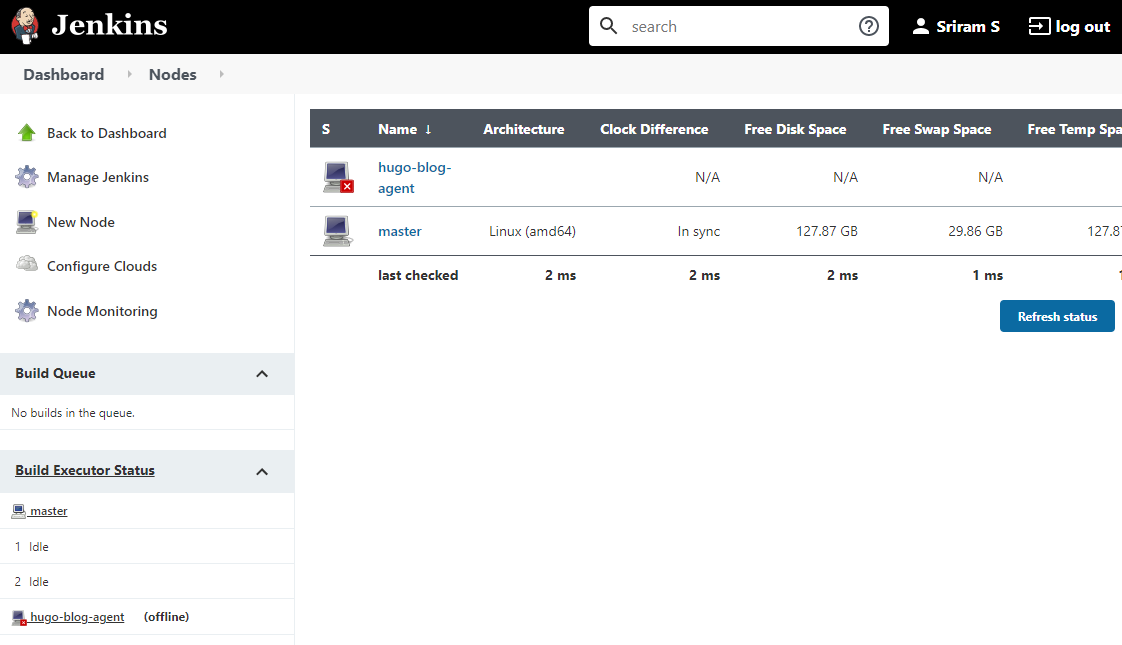
This should have resulted in an empty agent node getting added to the Jenkins master. The red cross mark on the node icon means that the agent is offline or unreachable. In the next section I will show you how to configure this agent and associate it with the docker container we have created.
- As a final step, click on the name of the agent. In the resulting screen, you will see some additional information like the secret. The secret will be needed to associate the docker container to the empty agent node.

Associating our docker container to the Jenkins agent
In this section, we will start our Docker container using the same image as that used by developers. By passing appropriate parameters to our container, we will associate it as an agent on the Jenkins master. Here are the steps for the same.
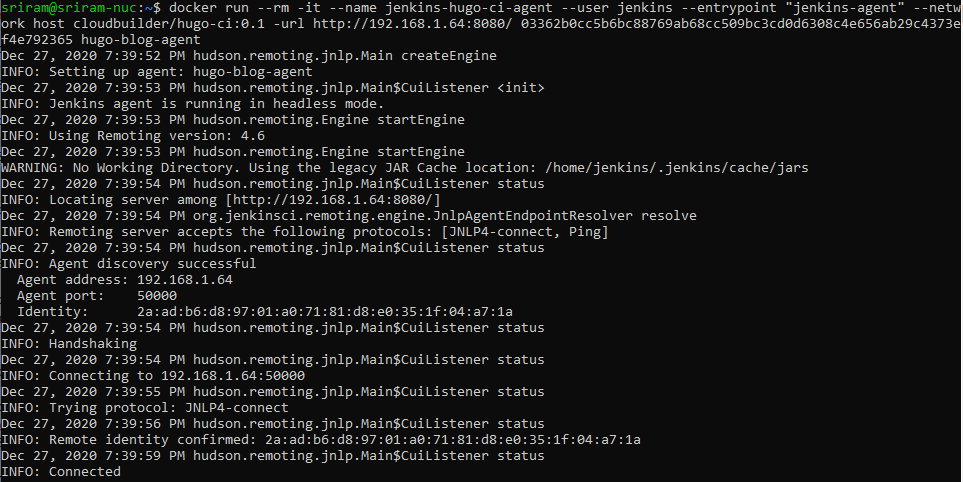
- Execute the docker run command as shown in the screenshot below. Note: the most important change is the use of a different “--entrypoint” value. When the same image was used by developers, we set the “--entrypoint” to an empty value. However, this time we are starting the container to act as Jenkins agent, therefore the value for “--entrypoint” is jenkins-agent. Also notice the secret is passed as a parameter to the docker container. This will be used by the jenkins-agent process. The final key parameter is the --url which is set to the Jenkins master. In the previous section, we configured the agent launch method to be “Launch agent by connecting it to the master”. The “--url” parameter is used by jenkins-agent process to connect back to the master.
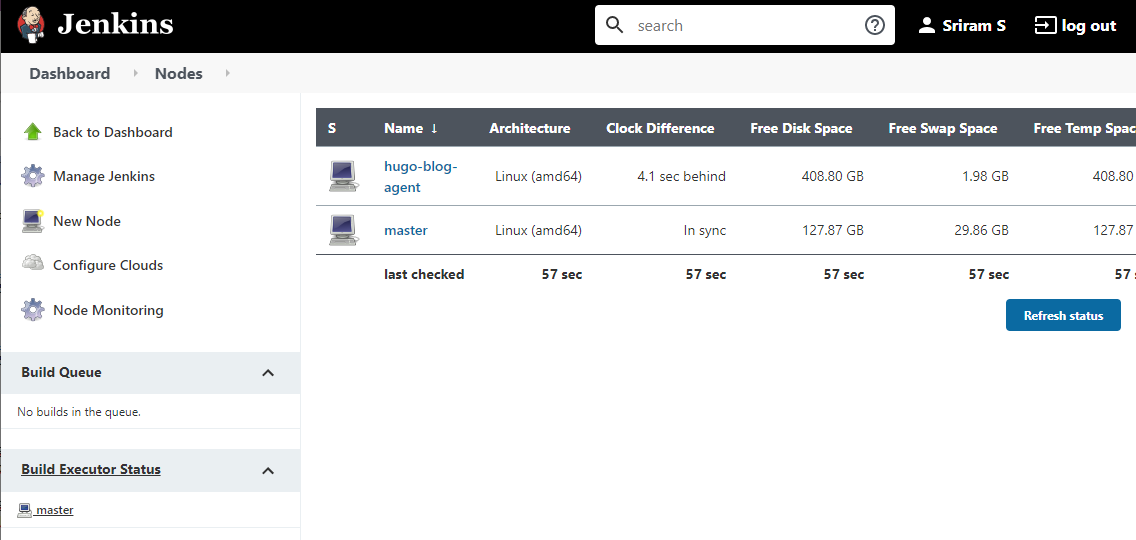
- Once the Docker container comes up successfully, you should see “INFO: Connected” message. At this time, login to the Jenkins master and check the status of the agent node again. The red cross mark should now be gone, indicating that the agent is up and running. It means that the agent can now service build requests from the master.
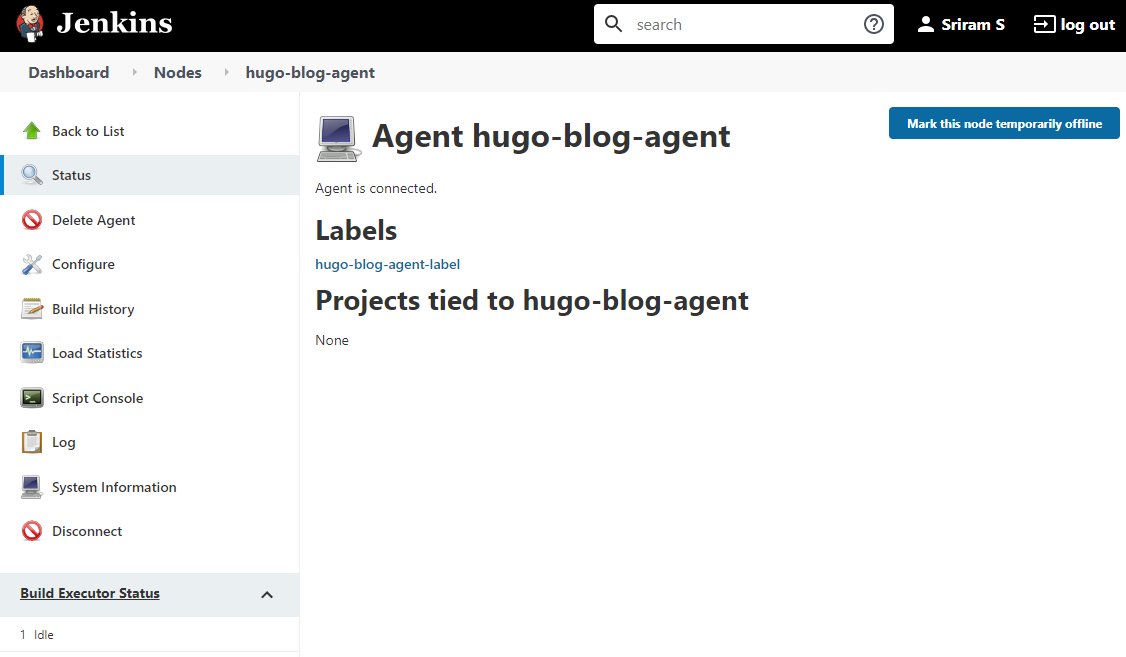
- Click on the agent node once again. This time, you should also see the message “Agent is connected”. The screen also shows the label associated with the agent. Labels will be used to trigger Jenkins jobs on specific agents.
Using the CI Docker agent to build artifacts
The final series of steps will show how to create an automated Jenkins job that will create an artifact. In my example, I will show how to create the ZIP file containing the static HTML version of my blog.
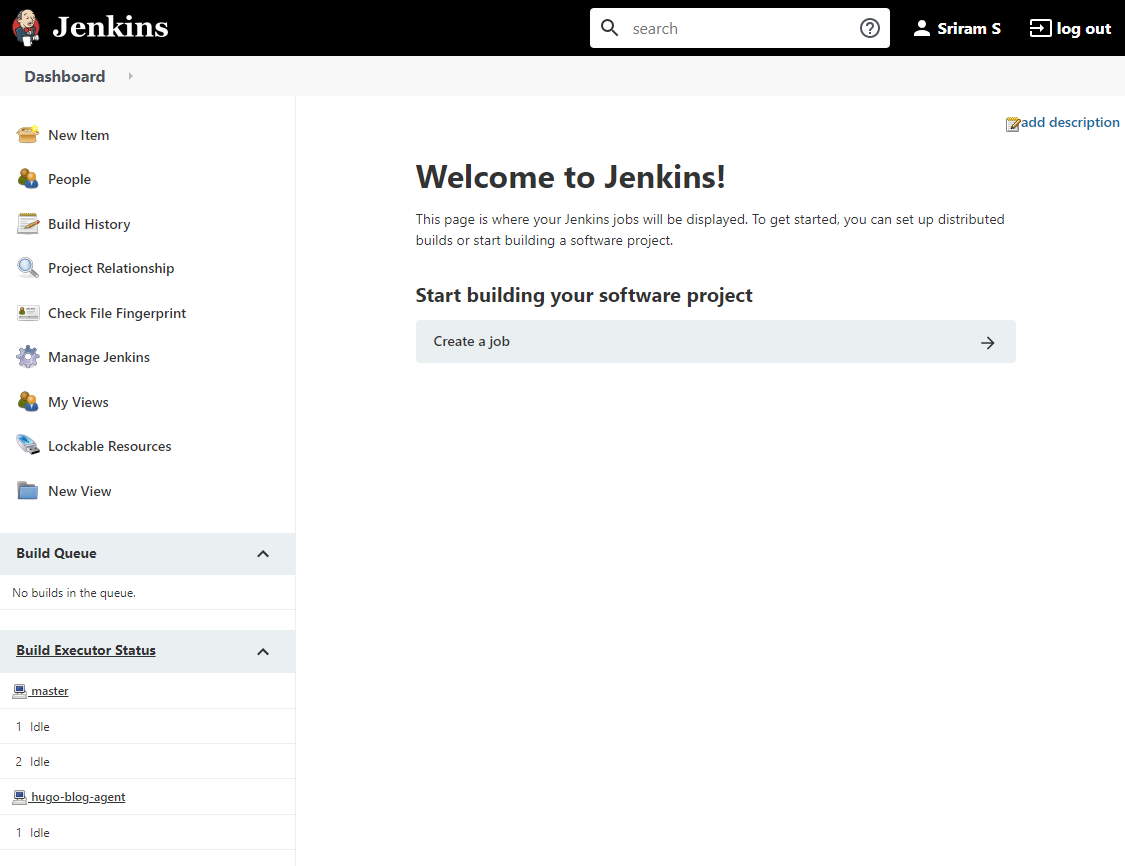
- Go the Jenkins master home page. You will notice the option to “Create a job”. Click that option.
- In the next screen, enter the desired name for the job and select “Freestyle project”. In real world environment, the appropriate options are “Pipeline” or “Multibranch Pipeline”. These options help in build different types of CI/CD pipelines.

From here on the steps I show are specific to my blogs. I use Bitbucket as my Git repository for storing the blog’s Markdown files. And use hugo to generate the static HTML/JS version of my blog. I have described the process in the first blog of this series.
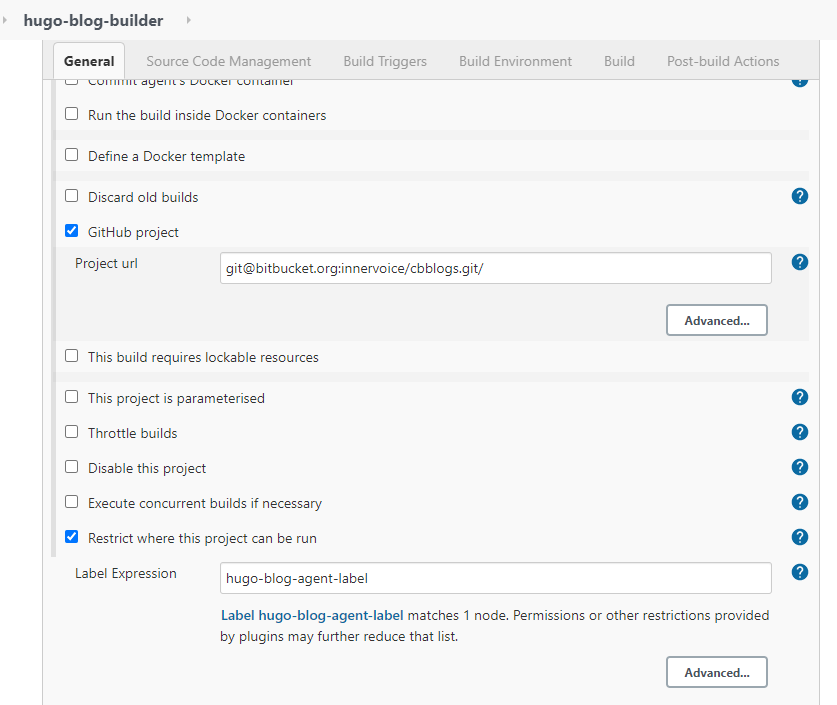
Enter the Git URL for the project. And then select the “Restrict where the project can be run” checkbox. This is an important step because here we will specify the label for the agent. This label tells Jenkins to run this build process on one of the agents that match the label. In our case, we have only one agent. But in real world, it is good to have multiple agent instances with the same label for redundancy and scale.
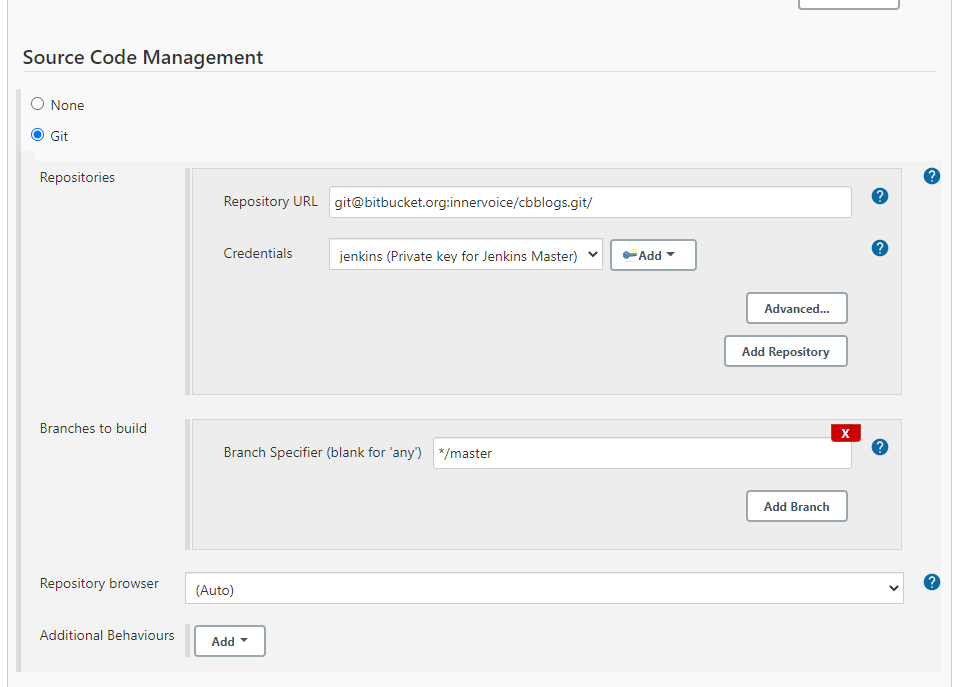
- Next we specify the Git credentials and the branch name (default is master) using which Jenkins will checkout the source code.
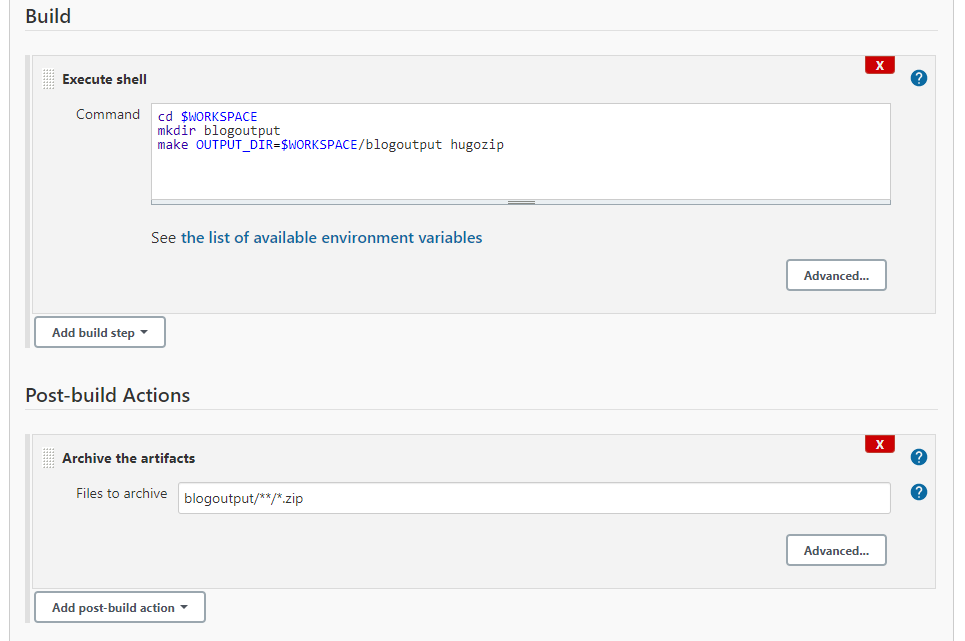
- Finally, in the the “Build” section, we specify the exact CI steps that Jenkins will run on the checkedout copy of the source code. In my example, I am running the make hugozip target. The goal is to checkout my blog source code and generate the static HTML files. I am also telling Jenkins to “archive the artifacts” in the *Post-build Actions" section. In my case, the artifact will be a ZIP file. Click on Save at the end of the window.
- Once the job configuration is saved, you can click on “Build Now” option to trigger the Jenkins job. In my case, the job will result in the creation of a ZIP file which will be stored (archived) on the Jenkins master. Note: using the “Build now” option is shown as an example here. In real world, builds are triggered automatically. Jenkins supports several different mechanisms to triggered automated/periodic build jobs.

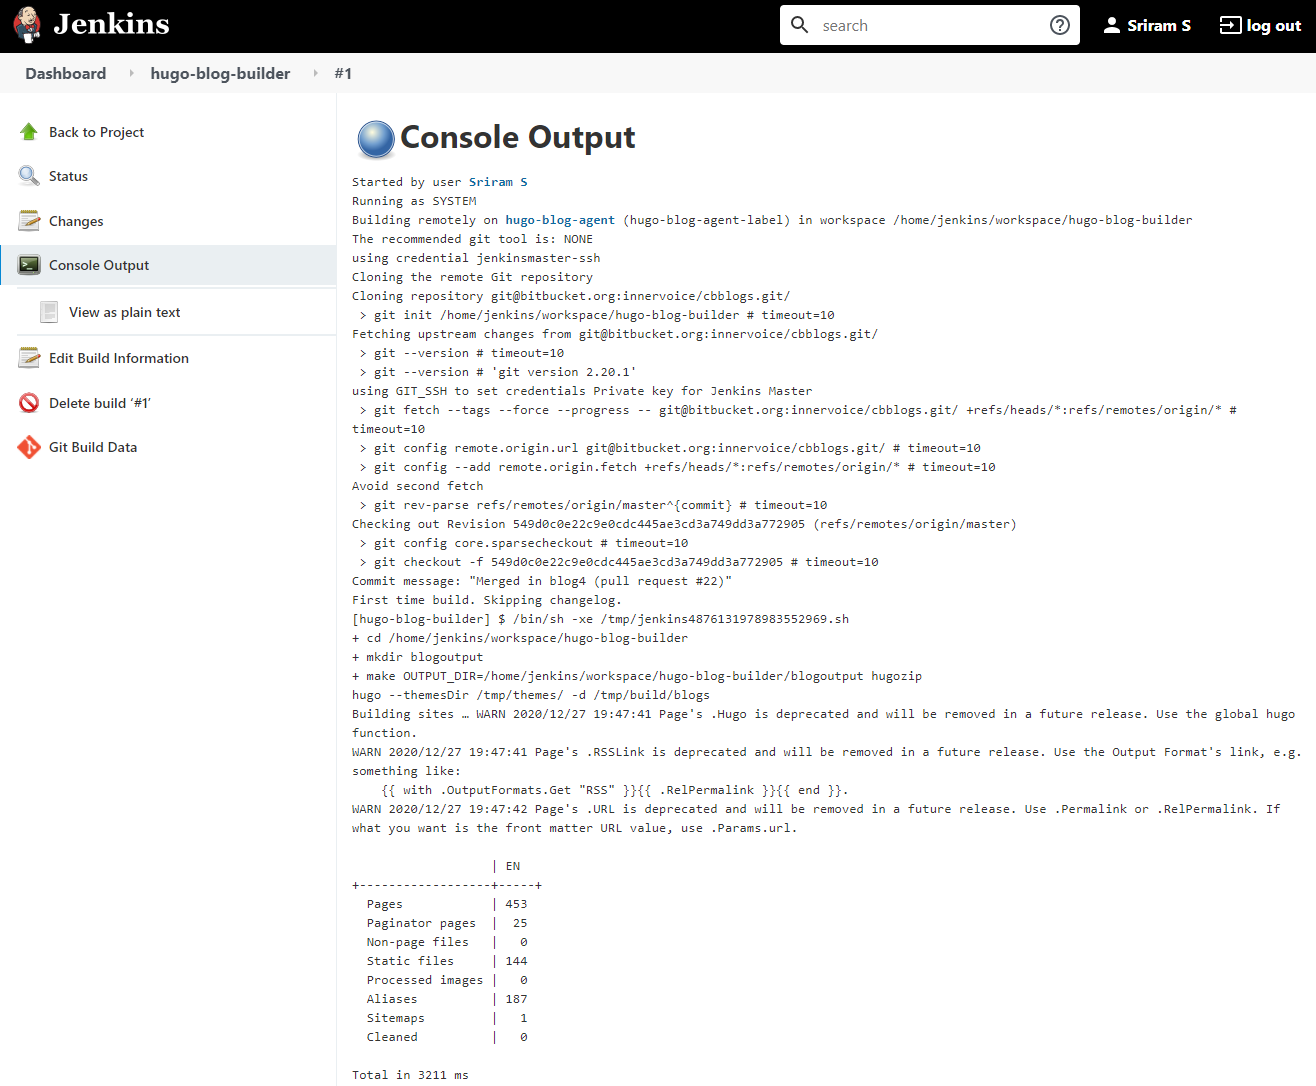
- You can see the exact steps and logs by click on the build number and then selecting Console output option.
Next up
This blog showed how to create an automated build job using Jenkins as the CI System. The most important element of this blog was that we used the same Docker image for Jenkins as used by developers. This ensures that developers and the CICD system are using the same environment to build the code. The benefit is of having this consistency is that it reduces environmental errors, such as incorrect dependencies or library versions etc. It also ensures that the manner in which developers generate and test the artifact is the same as the CI system.
To summarize, we have seen the CI process from the developer perspective and from DevOps/Jenkins perspective. As mentioned in my earlier blog, the CI process ends with the generation of an official build artifact.
The next steps are to test the artifact in a staging environment and then deploy it to the production environment. This the CD part of the CICD process.