PyCharm and OpenStack programming
OpenStack is based on the Python programming language and DevStack is the most common development and test environment for OpenStack. If you are doing serious, professional programming around OpenStack, it is very useful to have a proper development environment. In this blog, I will show you how to use the PyCharm IDE from Jetbrains for your OpenStack programming. I will use the Neutron ML2 driver code from my book OpenStack Networking Cookbook to guide you in setting up the PyCharm IDE.
PyCharm and OpenStack programming - background
DevStack provides a great test environment since it mimics a real OpenStack setup very well. DevStack includes development tools, but it is not the ideal development environment. Keeping development and test environment separate is a good practice. So it is better to write code in a non-DevStack environment and then deploy the unit tested code in DevStack for thorough testing. Moreover the benefits of using a visually-rich IDE such as PyCharm far outweigh the one-time effort to set it up.
PyCharm prerequisites and installation
In order to install and use PyCharm, you need to install Java (JRE) and Python 2.7. The PyCharm IDE is written in Java and hence it requires the JRE. But since the PyCharm IDE is intended from Python programming, you need the Python interpreter. OpenStack uses Python 2.7 so ensure that the correct version is installed.
The installation steps for Java (JRE), Python 2.7 and PyCharm IDE are fairly straight forward. Depending on your OS, you should be able to find the instructions easily for these.
Create a new PyCharm project and check out sample ML2 Driver code
- Once the IDE is started, click on New -> Project to create a new PyCharm project as shown in the screenshot below.
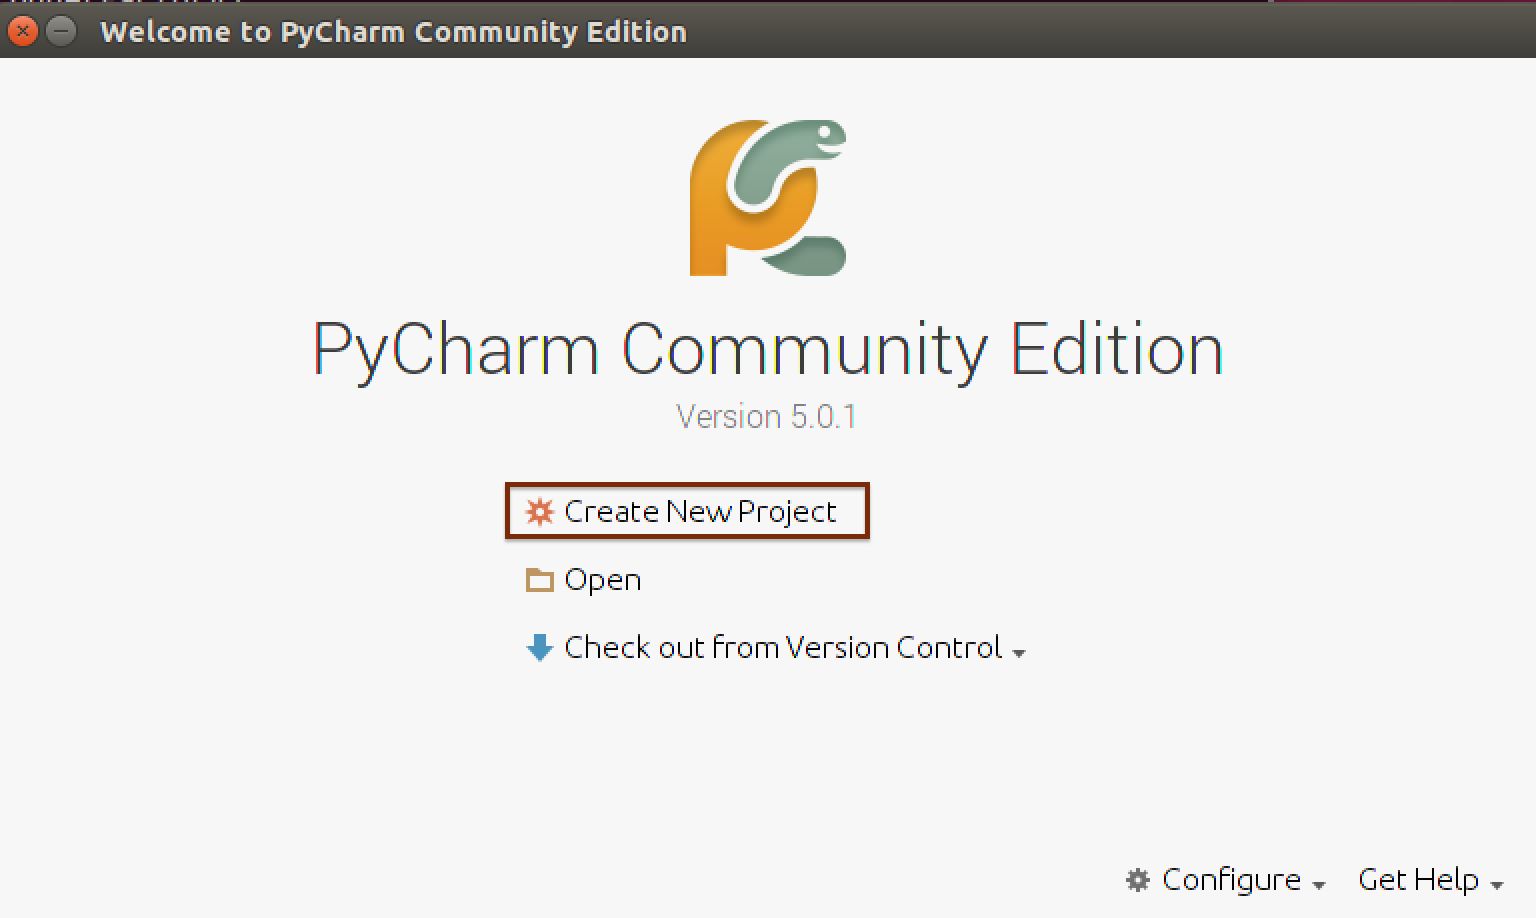
PyCharm New Project
- In the next screen enter the project name (you may have to replace the word “Untitled”). For this blog, lets call the project neutron-plugin. And then click on “Create” button at the bottom.
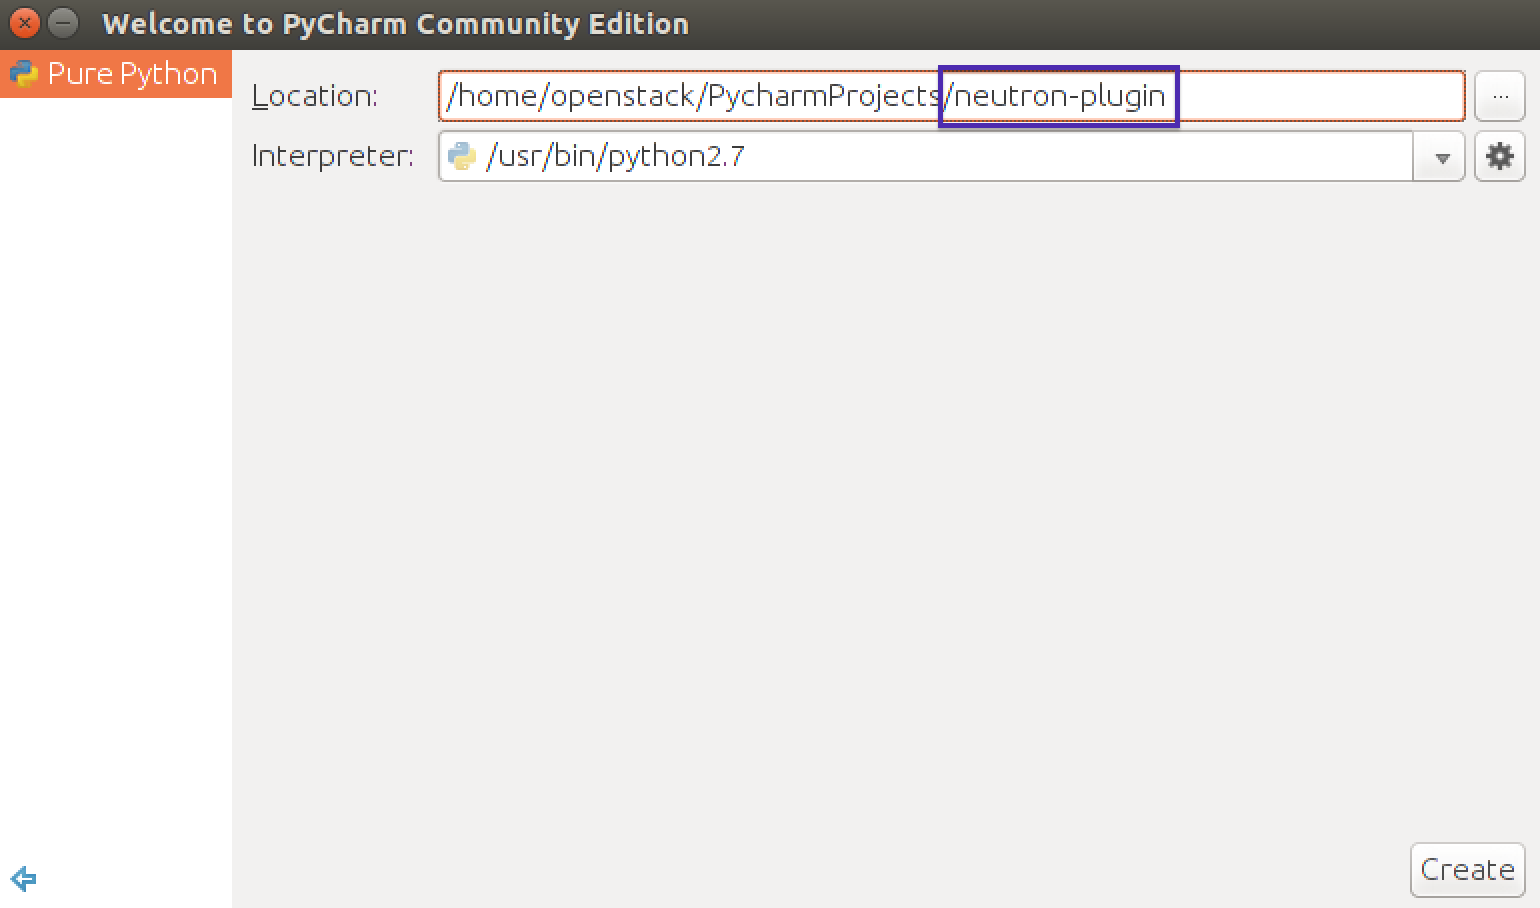
PyCharm Project Name
- Once the project is created, PyCharm creates a directory for it under “PyCharmProjects” directory by default. This folder can be found in the home directory of the user.
- Open a Terminal window (on Ubuntu) and change directory to the neutron-plugin project as shown below. And then use git clone command to fetch the sample ML2 driver code. The sample code is needed to show you how to resolve code dependencies.
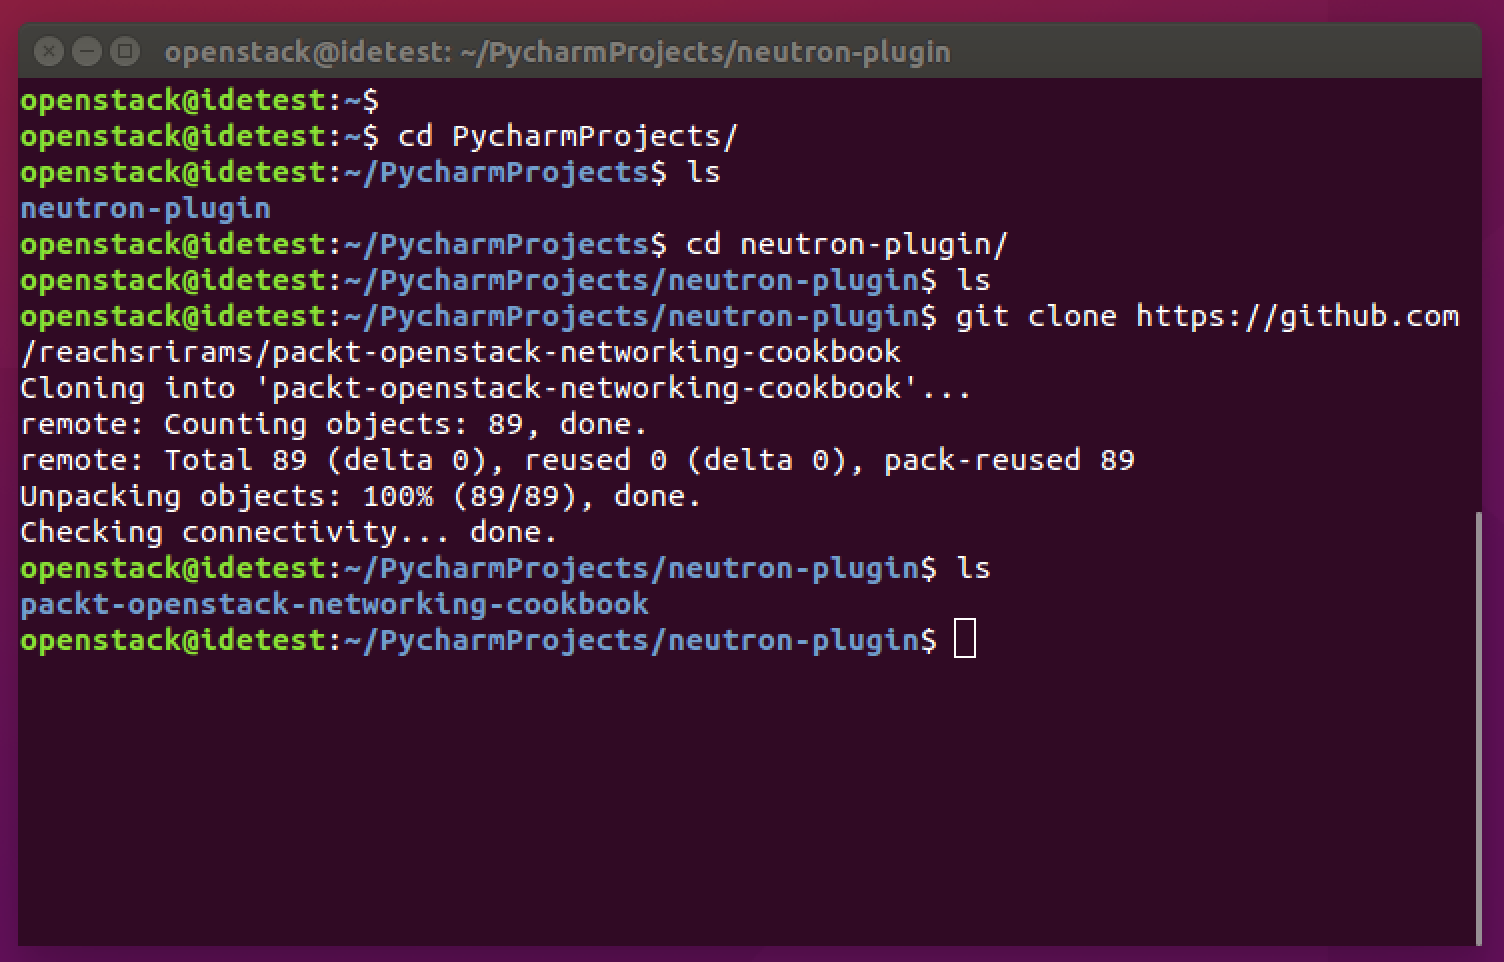
PyCharm ML2 Code Clone
- Once the code is checked out, PyCharm will automatically show the folder under the project. If you open any of the sample Python files (for example ch10_mech_driver_subnet.py) you will see that the Python modules imported in this file are shown as errors (red underlines). This is because we have not resolved the dependencies yet. Refer to the screenshot below.

Check out dependent packages
As seen from the steps to create the project, the sample ML2 driver code is dependent on OpenStack Neutron and Oslo Logging code modules. Now we will see how to download these modules.
- The first step is to check out OpenStack Neutron and Oslo Logging packages from Github using the git clone command. Here is how it looks in Ubuntu
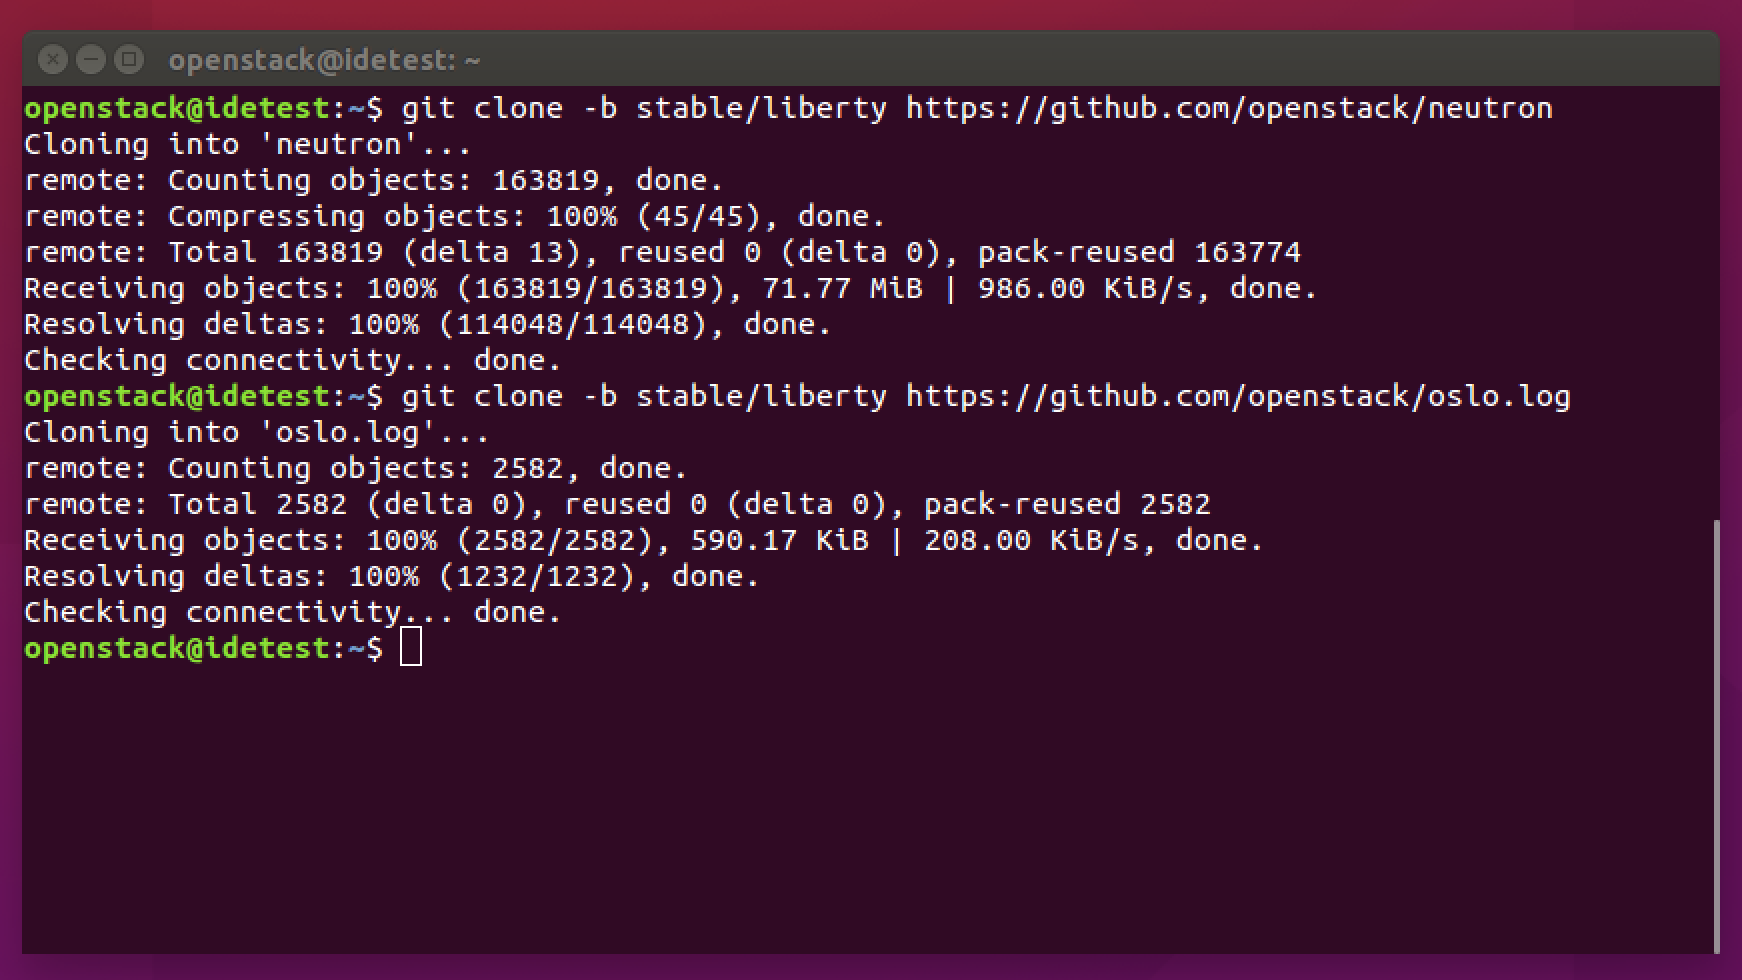
PyCharm Dependency Clone
- In my case, the Neutron and Oslo modules were downloaded to the home directory. Here is a screenshot that shows the content of the download modules
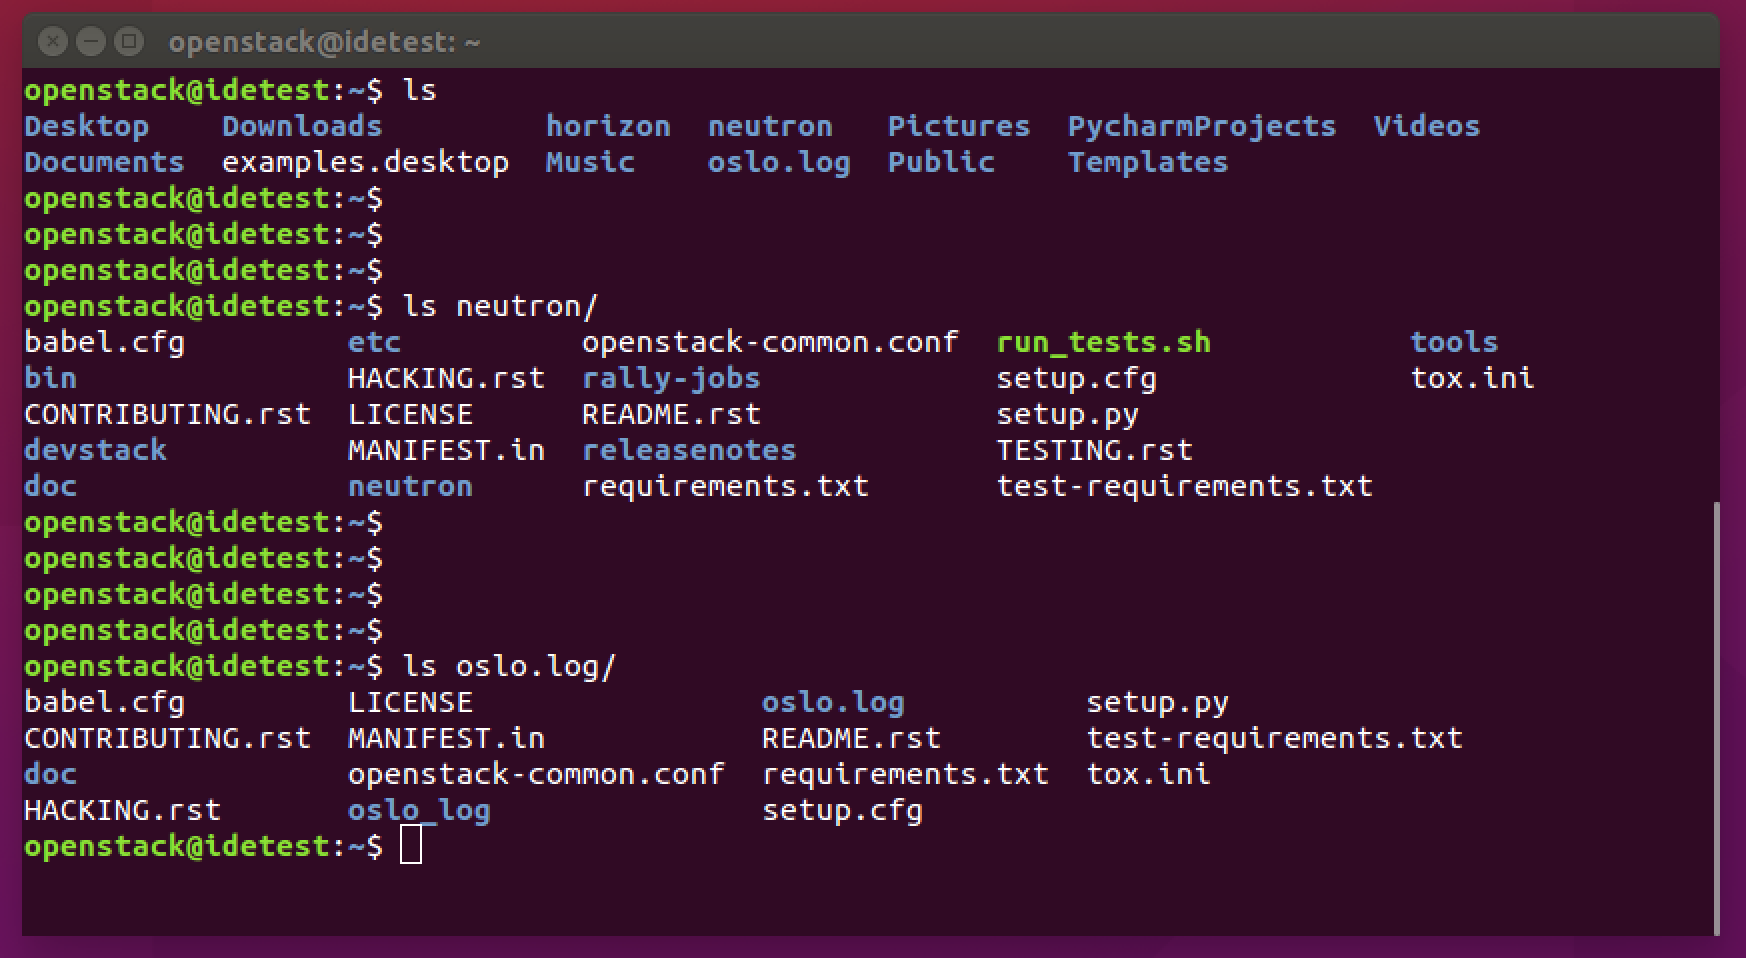
PyCharm Dependency Directory
Configuring PyCharm to resolve dependencies
Now that we have dowloaded the dependent modules, let me show the steps involved in configuring PyCharm to manage the dependencies. At the end of these steps you will see that “import errors” seen in our sample source code will be eliminated.
- Click on File and then Settings menu item.
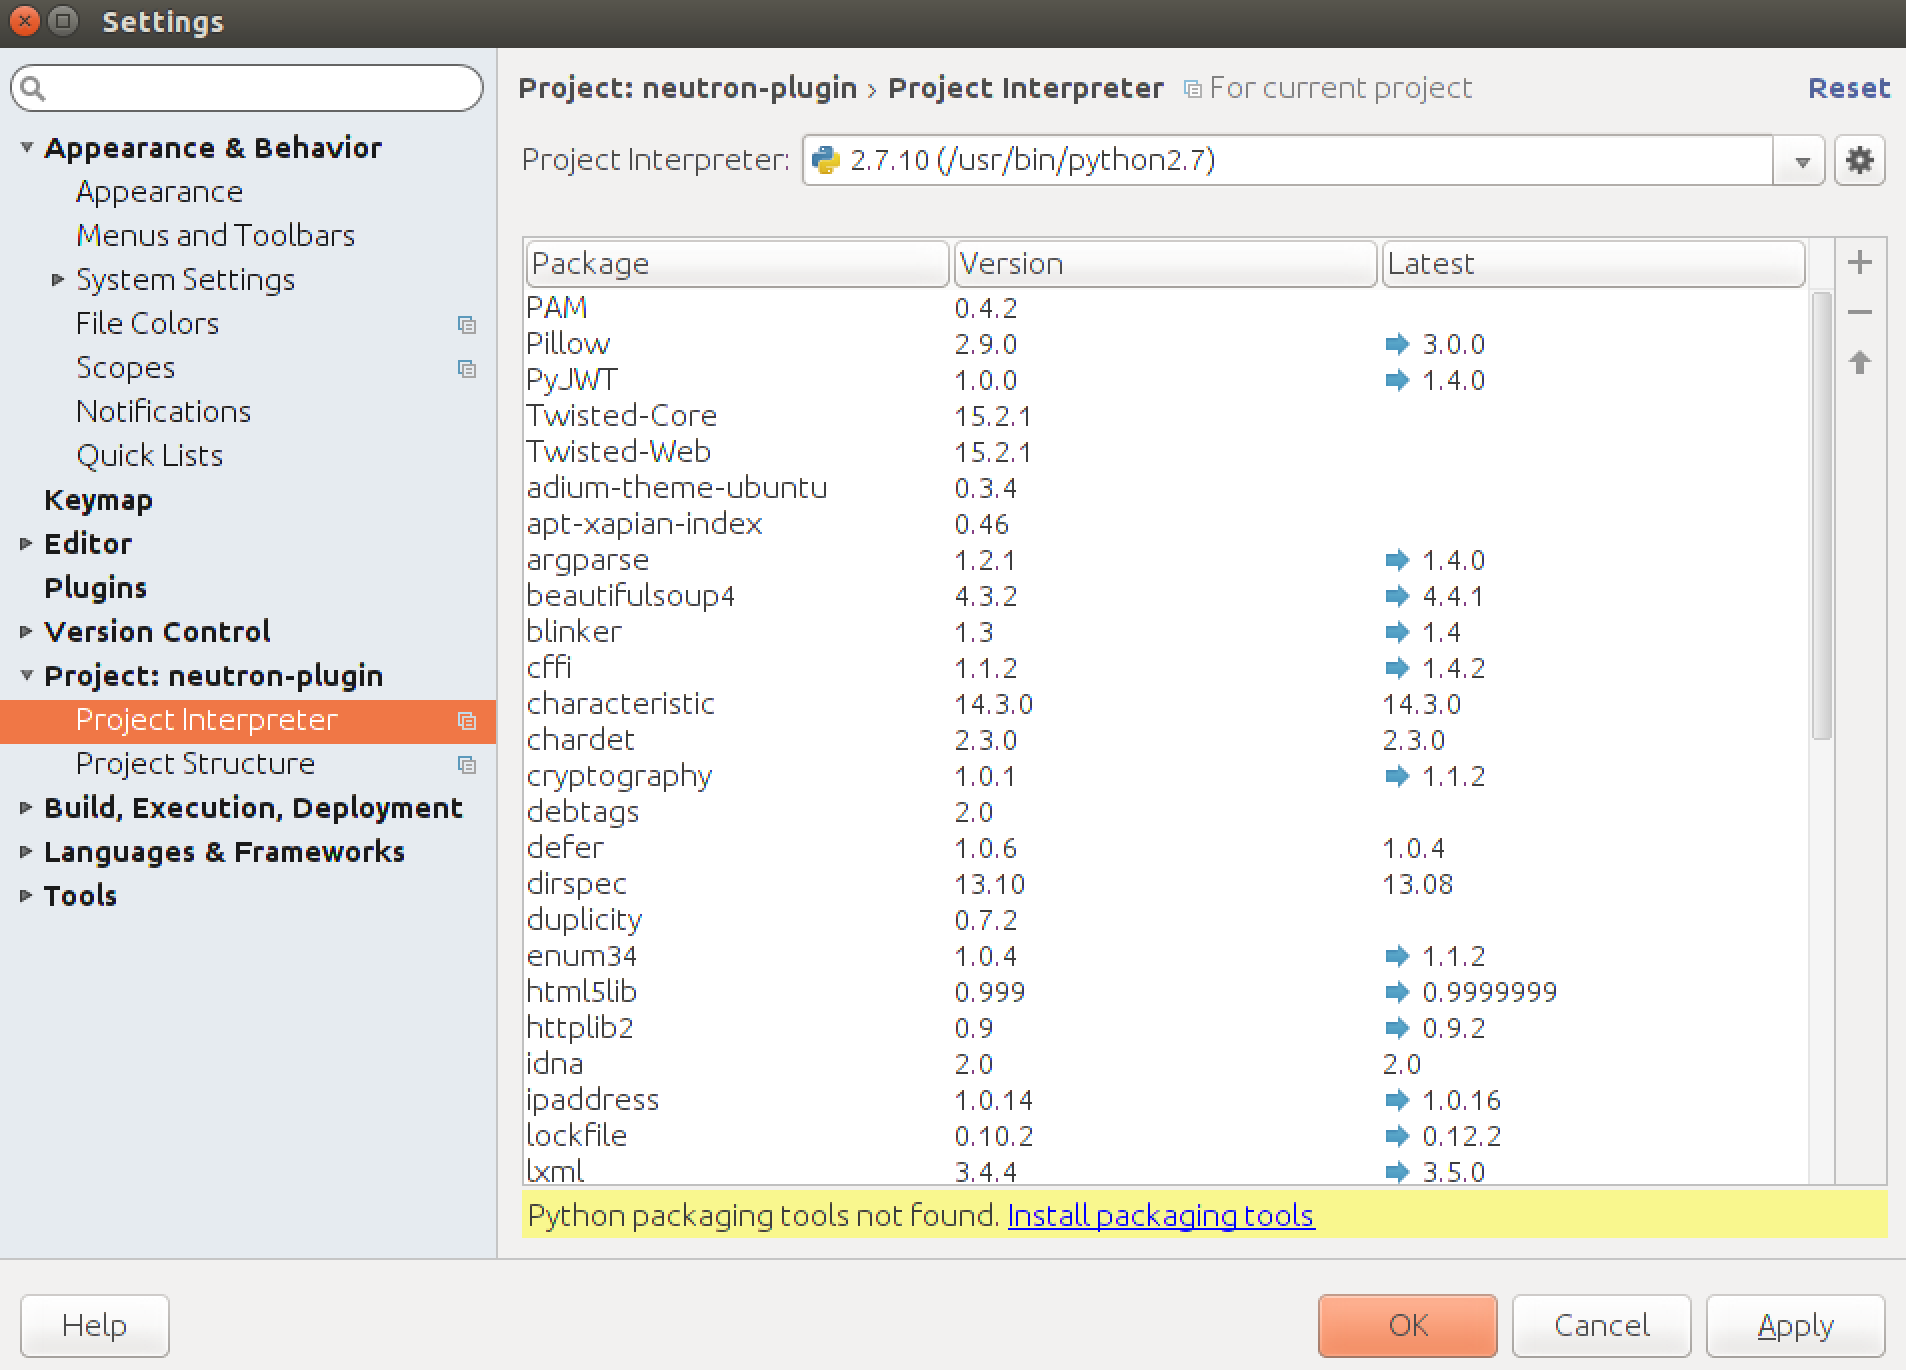
- In the resulting dialog box, select “Project Interpreter” under “Project: neutron-plugin” as shown below. Then on the right hand side click the “gear” button.
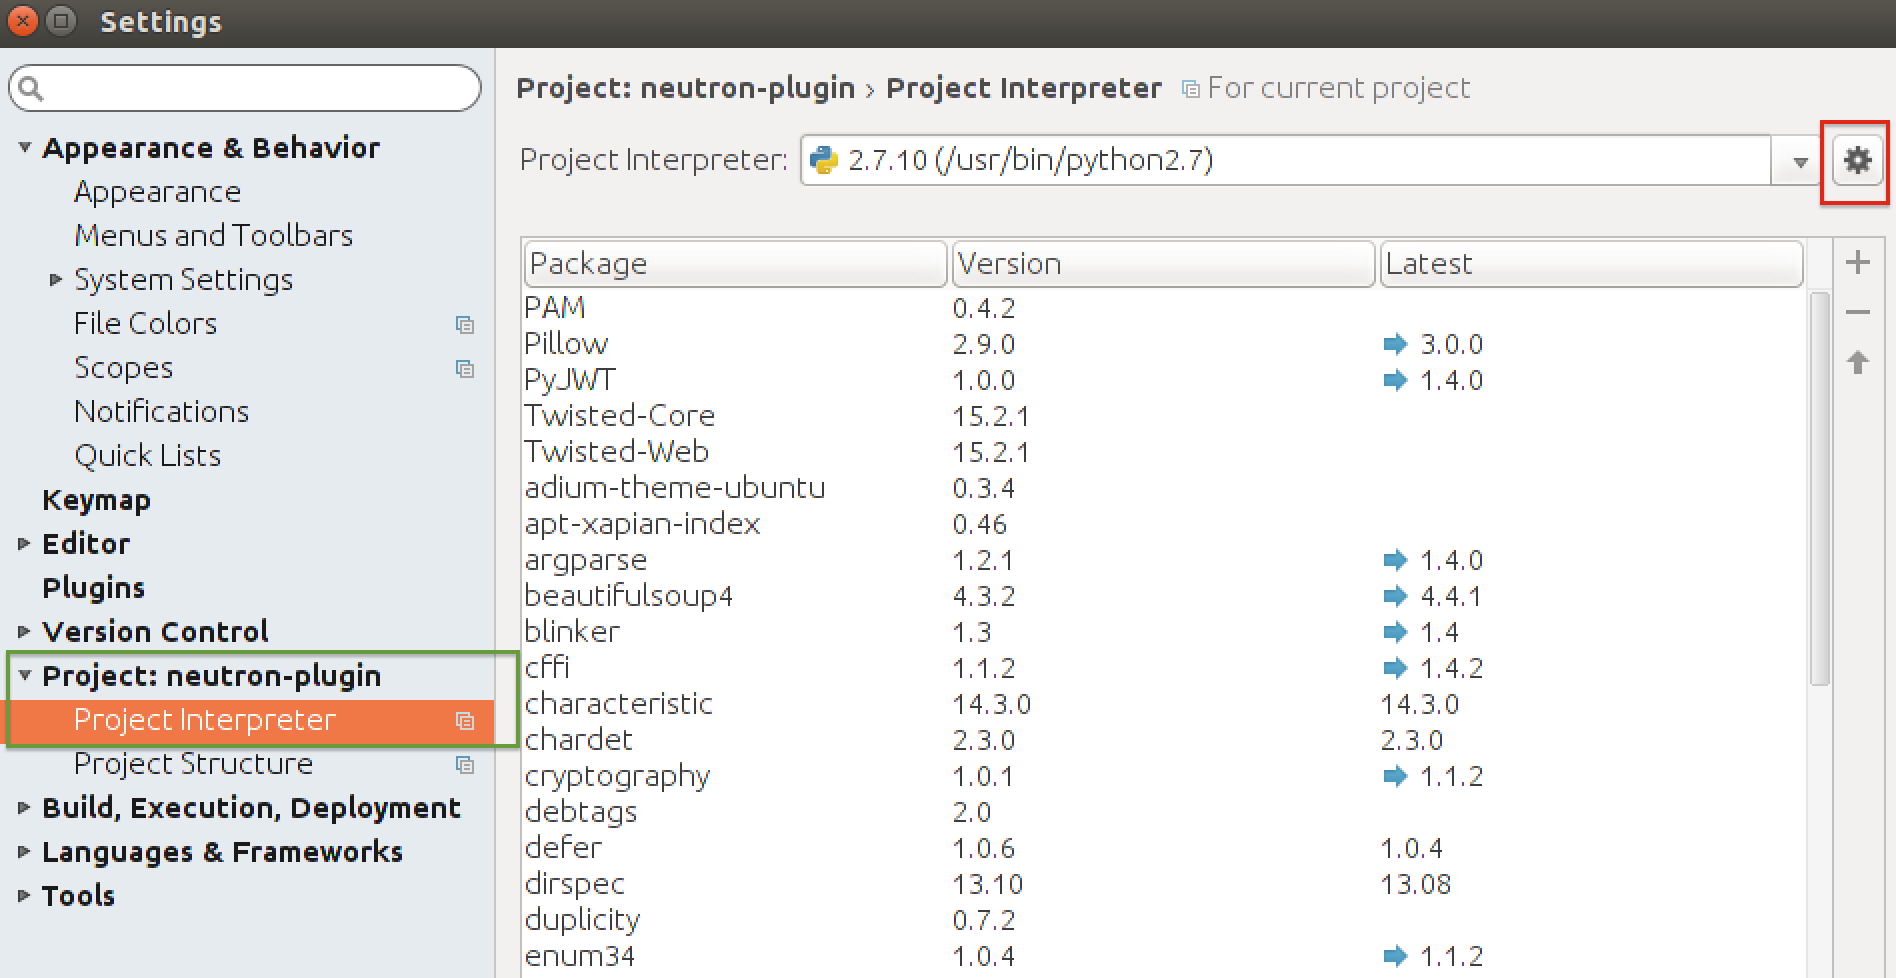
PyCharm Project Interpreter
- Once you click on the “gear” button you will see several options - click on “More”
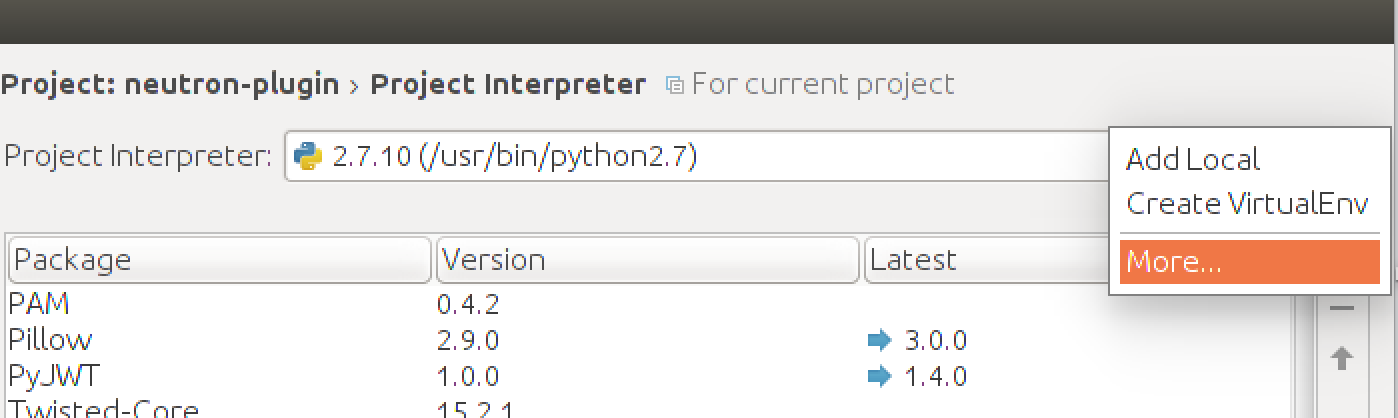
PyCharm Interpreter
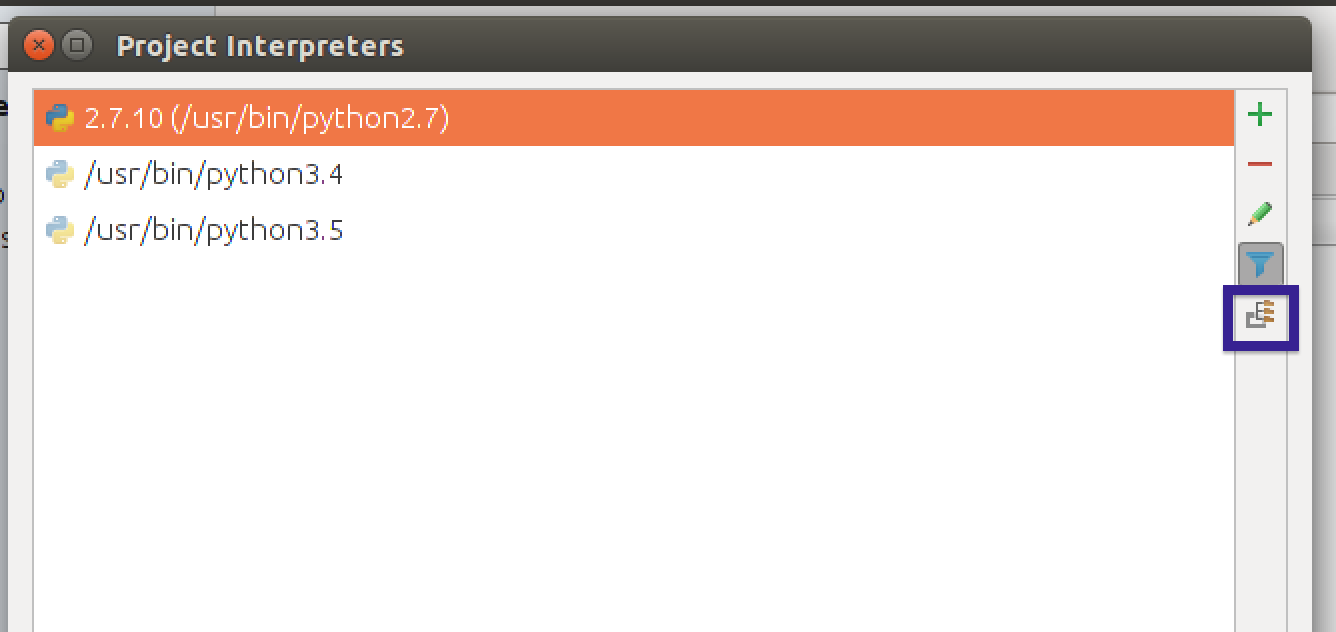
- The resulting window shows all the project interpreters. Click on the “Show paths for selected interpreter” button as highlighted below. This will allow us to configure Python Paths for this interpreter (for this project).
PyCharm Interpreter Path
- Click on the “+” sign and choose the folders/directories that contain the dependencies.
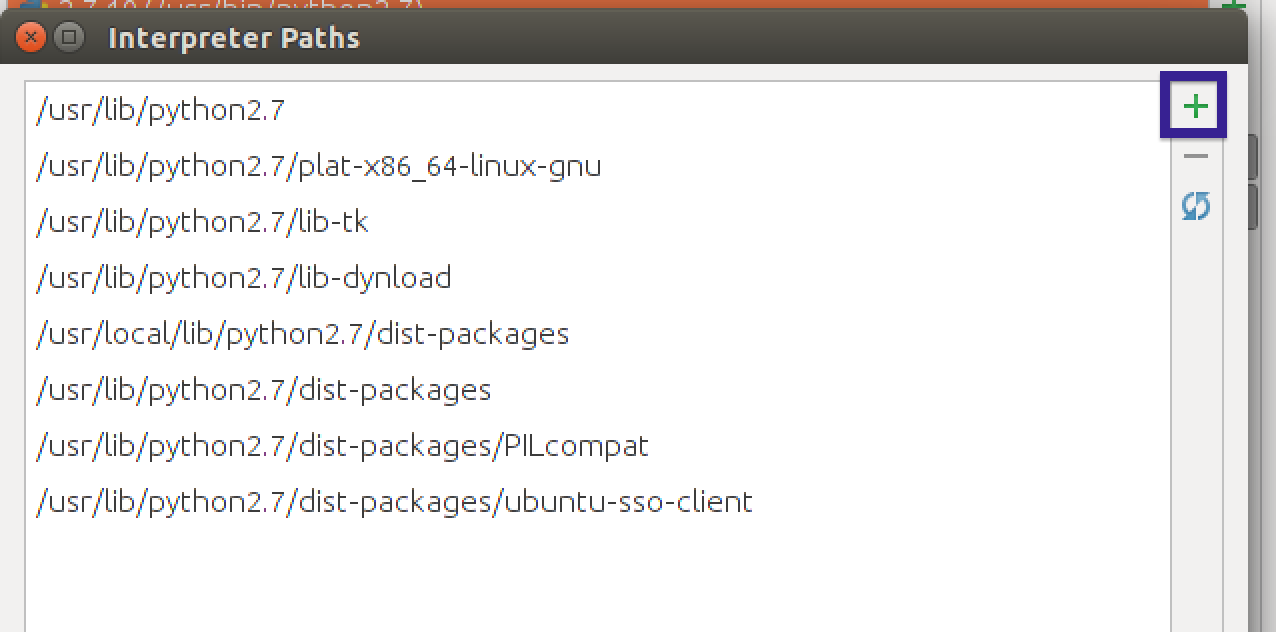
PyCharm Interpreter Add Path
- For this blog I will select the Neutron and Oslo Logging module directories as shown below.
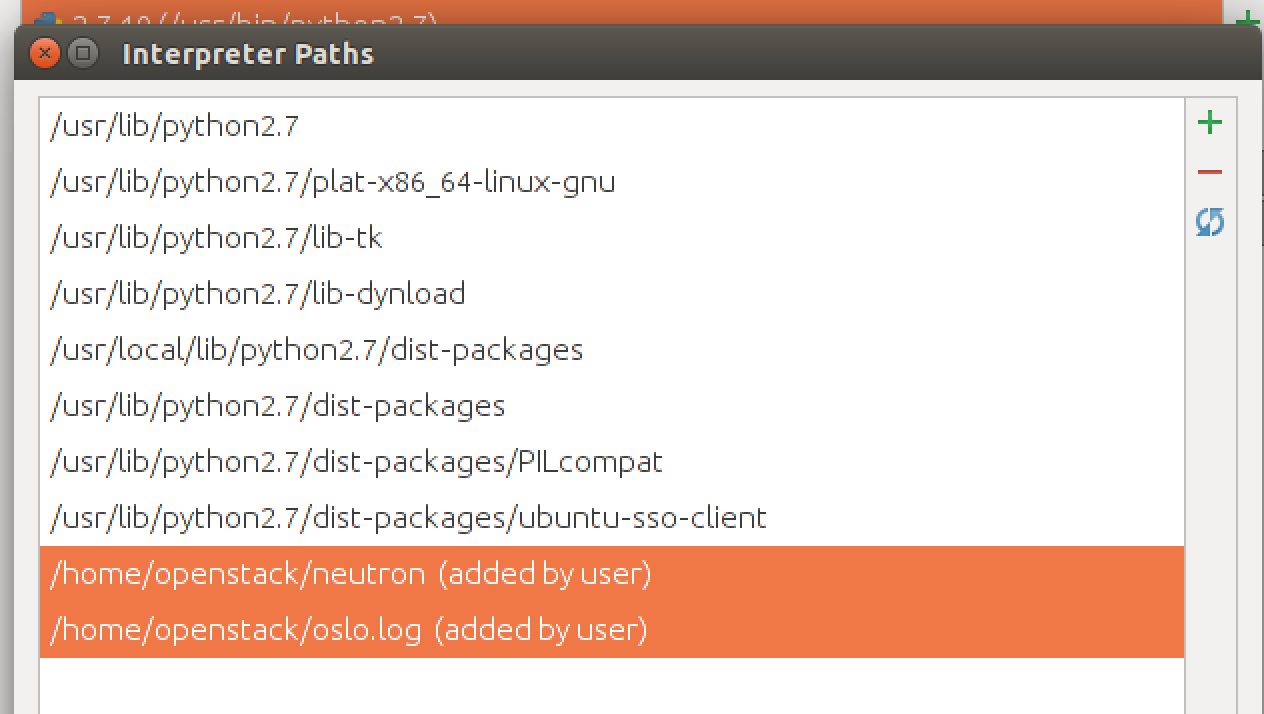
PyCharm Add New Paths
- Click Ok and ensure that the Settings window is closed.
These steps complete the configuration of dependencies for our ML2 driver code. You may have to tweak these steps depending upon the kind of OpenStack programming you are doing.
Resolution of code dependencies
Once the dependencies are configured, PyCharm will load the modules and resolve the code errors seen in our ML2 sample code. You should now see that the “red underline” for the import statements are eliminated as shown below.

PyCharm Code No Error
Conclusion
Once the code errors are resolved, you as a developer can continue with the rest of your programming. The additional benefit of resolving dependency is that PyCharm will auto-complete the code as you type characters into your IDE. It will also perform syntax checks and provide instant feedback in case of errors. This helps in avoiding many programming errors and will save time.