Wired and Wireless network on Ubuntu for OpenStack
In data center and cloud environment, servers used for hosting the virtual machines usually have more than one wired networking interfaces. In fact there are multiple Ethernet interfaces on each server. It is common practice to use one of the interface for ‘managing’ the host itself. This interface is usually accessible from corporate networks and administrators will use this interface for doing SSH into the server. The other interfaces are usually used for virtual machine traffic or storage traffic.
This practice is depicted in the picture below.
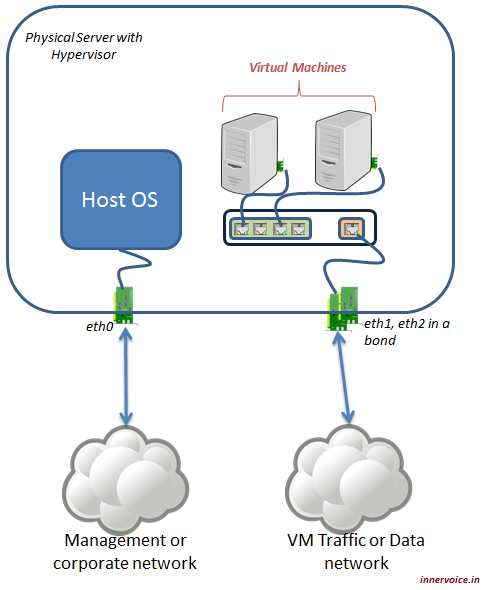
Host Wired Network Configuration
How to do home OpenStack Lab?
When I was experimenting with a Home lab for OpenStack, I realized that home PCs (desktops or laptops) have at the most 2 interfaces. One is wireless and another the wired Ethernet interface. Now for Linux based virtualization, we have seen that Linux bridge can be used as a virtual switch. But Linux bridge works at Layer 2 level only with physical (wired) interfaces. So in a home lab, the virtual machine traffic must be sent over the wired network. Hence the wireless interface needs to be used for management or Internet connection. This is depicted in the picture below.
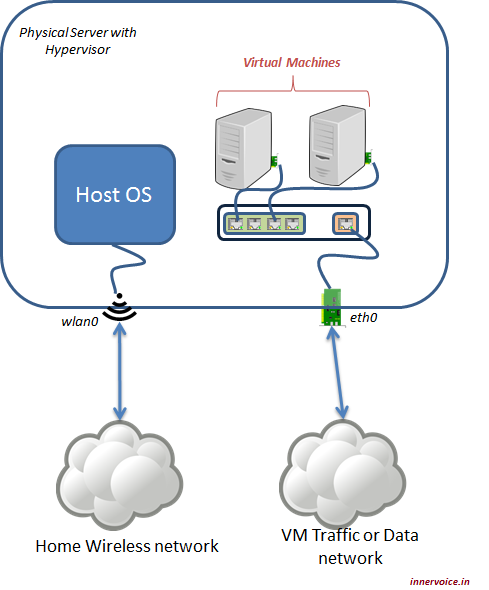
Home Lab Wired and Wireless Network Config
Configure Wireless interface for internet and wired for private network
Wired and Wireless interface on Ubuntu
In Ubuntu, it is possible to use the Network Manager GUI to configure both wired and wireless network interfaces. But the moment both are configured, Ubuntu automatically chooses wired for internet access. In my home lab, I want to use the wireless interface for Internet and Home network access. And I want to use the wired interface for VM traffic.
Solution
Fortunately, the solution to specifically use the wired network only for private network is easy. You need to configure you Ethernet interface to be used only for the IP address in the same subnet as your Ethernet interface.
- Step 1: Open the Network Manager GUI by clicking on the networking icon on the top right bar and selecting “Edit Connections…”. You should a dialog box similar to the one here:
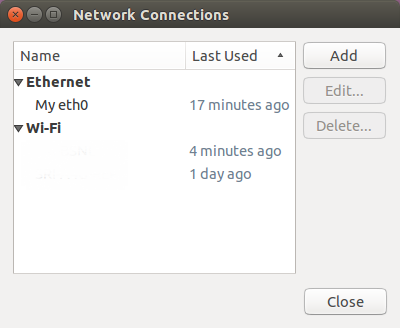
Ubuntu Edit Network Connections
- Step 2: Choose your Ethernet interface, then click Edit button and then select the IPv4 tab. Now you should see a dialog box similar to below.

Ubuntu Edit Ethernet IPv4 Settings
- Step 3: Click on the “Routes…” button. And in the resulting box, ensure that “Use this connection only for resources on its network” is selected/checked.
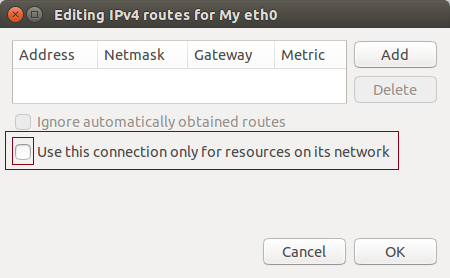
Ubuntu Edit Routes for an Ethernet interface
After these steps, the Ethernet interface will be used only for IP address that are in the same subnet. For all other IP addresses (including Internet) the wireless interface will be used.
**Note: **for those who understand networking/routing very well, this step changes the interface for the default route. Read more here.